User Story: Client Portal
The Client Portal is the authenticated SuiteDash experience an account designs for Clients. It is not a replacement for the tools a Client is permitted to use; it is the branded environment around their Dashboard, assigned Portal Pages, navigation, and enabled SuiteDash work. White Label is a major part of that experience: it lets the account present the Portal through its own identity while still controlling who can see each area.
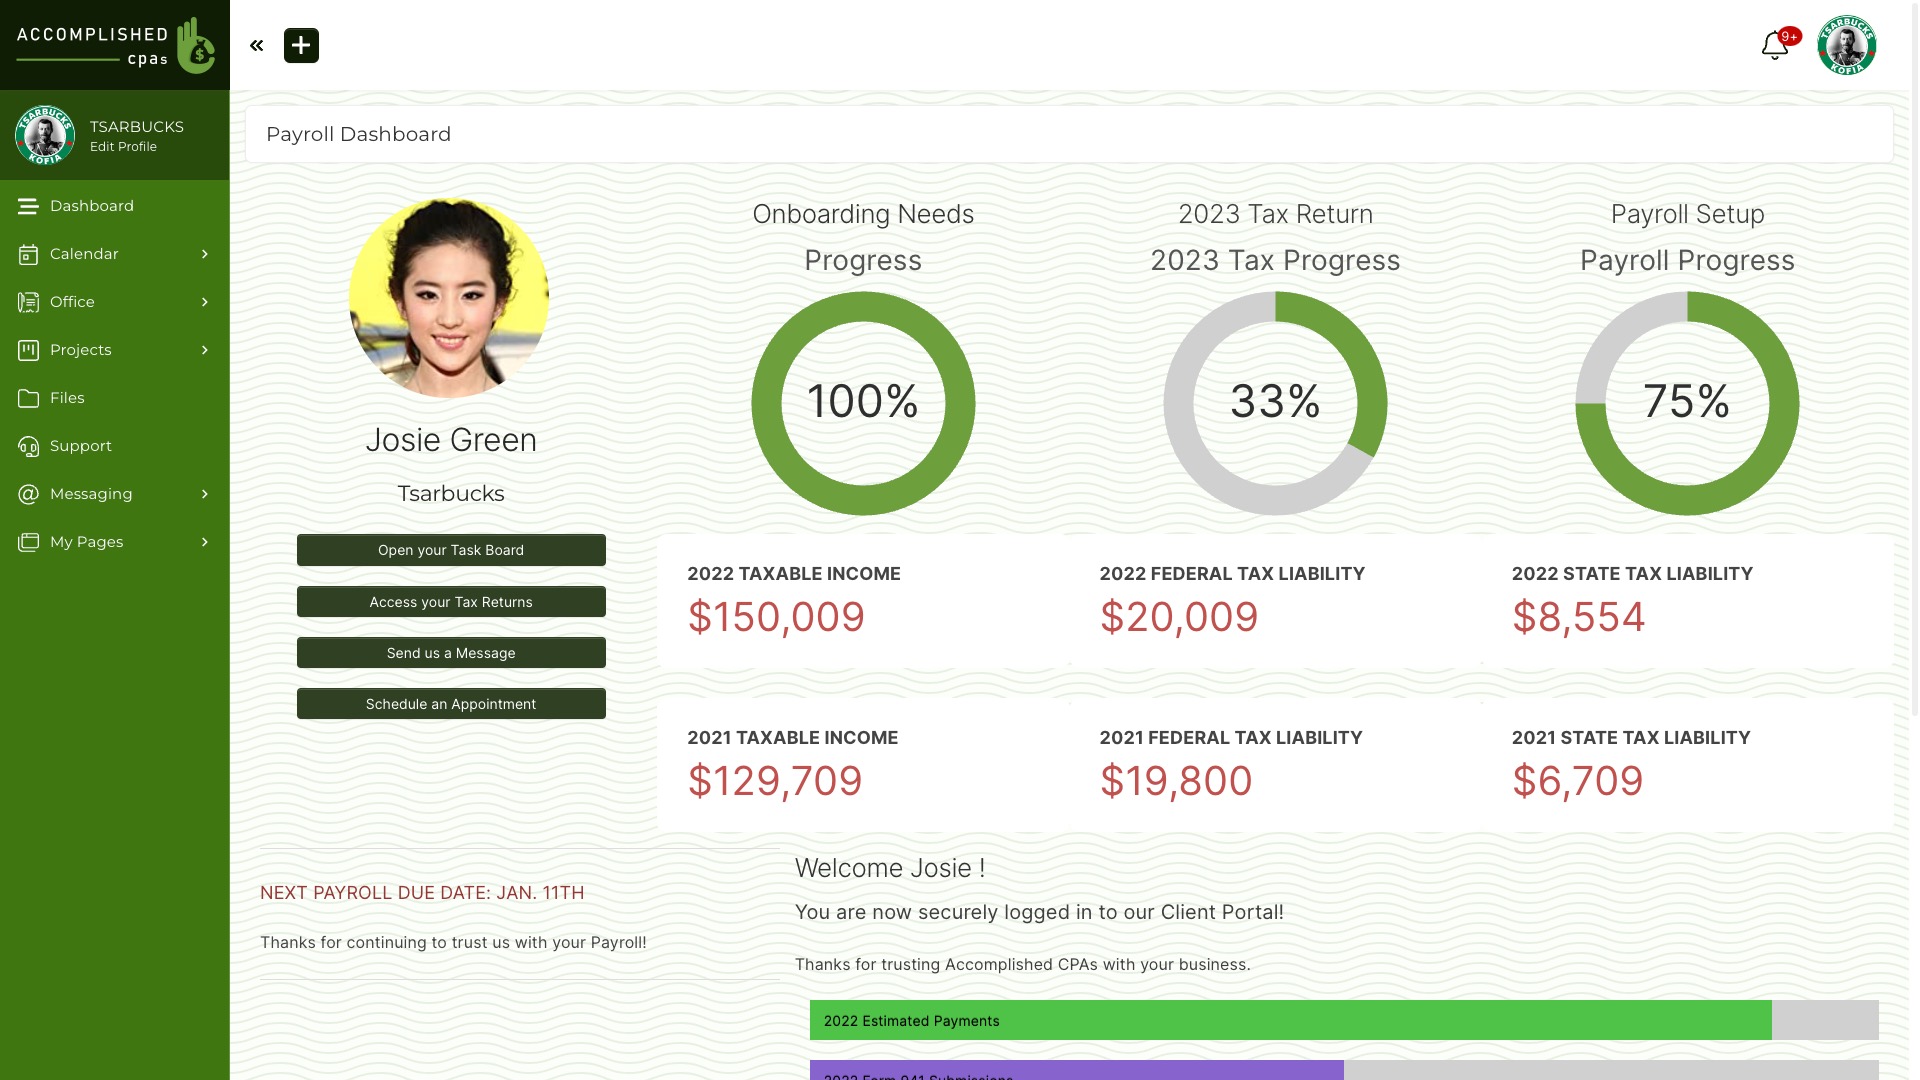
For a Client, the experience can begin with a Dashboard or with an assigned Start Page, then lead to the Projects, Files, Forms, Documents, messages, and other enabled areas that the account has made available. For the account, the work is to deliberately combine brand, page content, Dashboard priority, and access assignments rather than treating the Portal as one fixed screen.
At a glance
| This experience lets you | Important boundary |
|---|---|
| Present the Portal with your company’s logo, colors, and a Custom URL. | An account can have one Custom URL, and configuring it requires the appropriate DNS record. |
| Give a Contact a Dashboard tailored by direct assignment, Circle or Team, or Role. | A Fallback Dashboard is shown when no other Dashboard is assigned; the fallback cannot be deleted. |
| Give Clients and Staff Portal Pages with resources, announcements, guides, or personalized content. | A user sees only Portal Pages they are permitted to view; when none are assigned, the client-side Pages menu does not appear. |
| Make an assigned Portal Page the first destination after sign-in. | The user must already have access to that Portal Page before it can be assigned as their Start Page. |
What it is — and what it is not
The Client Portal is the account’s authenticated customer experience across SuiteDash. Its visible starting points include Dashboards and Portal Pages, and its broader usefulness comes from giving a Client an appropriate route to the SuiteDash areas the account has enabled for that Client.
Dashboards are personalized home bases. Portal Pages are private pages for logged-in users and can hold information, resources, announcements, videos, charts, and other content. A Portal Page can be assigned to Contacts and/or Staff by Role, Circle, or individually; dynamic data can personalize the content a viewer sees.
White Labeling is the account-level presentation layer, not an access-control shortcut. Platform Branding controls visual elements such as colors and logos; Custom URL and Custom Login settings shape the sign-in experience; Email Branding applies the account identity to notifications. Those choices do not by themselves give a Client access to content, a Page, a Project, or another tool.
Who uses it
| Person | What they can do | What they cannot do or need from someone else |
|---|---|---|
| Super Admin or authorized account owner | Set Platform Branding, Custom URL and login options, create Dashboards, create Portal Pages, and configure who can manage Portal Pages. | Brand settings do not automatically decide content visibility; assignments and the applicable feature settings still govern access. |
| Authorized Staff page manager | Create and maintain Portal Pages when granted Manage Pages access by Role, individual user, or Team. | Cannot manage Portal Pages unless the account grants that access. |
| Client or Prospect | Sees the assigned Dashboard, Start Page, Portal Pages, and the Portal areas that the account has enabled for that user. | Does not see an unassigned Portal Page; the Pages menu is absent when no Portal Pages are assigned. |
| Staff member | Can receive a Dashboard, Portal Pages, or a Start Page appropriate to their work. | A Portal Page Start Page requires the Staff member or Team to be assigned access first. |
Where to find it
- Brand the authenticated experience: open the Flyout Menu, then use Platform Branding, Custom URL & Login, and Email Branding.
- Create and manage Dashboards: Content > Dashboards.
- Create and manage Portal Pages: Content > Portal Pages; choose + ADD Portal Page to create one.
- Configure who can manage Portal Pages: Content > Portal Pages > Manage Pages > Settings.
- Reorder Portal Page menu items: Content > Portal Pages > Page Order.
Set up the Client Portal experience
- Set the account identity in Platform Branding: choose a theme and add the Desktop and Mobile logos that should appear in the Portal.
- Configure the Custom URL and Custom Login experience before presenting the Portal under your own domain. A Custom URL is persistent across Portal use, including generated links such as invoices and proposals.
- In Content > Dashboards, configure the fallback experience and create Dashboards for audiences that need a distinct home base. Set their priority deliberately: direct user assignment has the highest priority, Circle or Team assignment is the middle priority, and Role assignment is the lowest.
- In Content > Portal Pages, create an assigned content destination for onboarding, resources, announcements, policies, or guided next steps. Choose the Content Block Editor or Article Style Editor as appropriate.
- Assign the Page to the right Contacts, Circles, Staff members, Teams, or Roles. If it should be the first destination after sign-in, assign the Page as that user’s Start Page only after access has been assigned.
- Preview the Page as a particular user before relying on it, especially when content contains dynamic data or the design uses Styling Options.
How the experience works
A Client signs in to a relevant home base
When a Client does not have another Dashboard assignment, they see the Contact/Staff Fallback Dashboard. When the account has created other Dashboards, the highest applicable assignment wins: direct assignment takes precedence over Circle or Team assignment, which takes precedence over Role-based assignment. A Portal Page can instead be assigned as the user’s Start Page, so the Client lands on that Page first while retaining access to the Dashboard.
The Client moves through assigned content and enabled work
The Client can use the authenticated Portal areas made available to them. Portal Pages provide a controlled content layer within that experience: the Dynamic Pages Menu is generated at sign-in from the Portal Pages the logged-in user may view. Different Circles can be shown or hidden content blocks within a Portal Page, so one Page can serve different assigned audiences without exposing the same content to everyone.
The account keeps the Portal coherent as needs change
The account can edit a Portal Page’s content, assignment details, or menu display; save a Page as a template; duplicate it; or make it available as a Dashboard. It can reorder the Portal Page menu and adjust Dashboard assignments or priority as an audience changes. Each change should be checked from the intended user’s view, not only from the editor.
Important settings and their effect
| Setting | What the customer sees or what changes | When to use it | Guardrail |
|---|---|---|---|
| Platform Branding | Sets portal theme elements, including desktop and mobile logos, fonts, navigation colors, and other platform styling. | Use it to make the signed-in environment consistently reflect the account’s identity. | Branding changes appearance; it does not grant tool or content access. |
| Custom URL | Provides the account’s custom address for Portal use and generated links. | Use it before sharing a branded sign-in destination. | Only one Custom URL is available for an account; use the Custom URL when signing in so generated links use the correct address. |
| Dashboard priority | Determines which Dashboard applies when a user has more than one assignment path. | Use direct assignment for the most specific experience; use Circle, Team, or Role assignment for broader groups. | The Fallback Dashboard applies when no other Dashboard is assigned and cannot be deleted. |
| Portal Page assignment | Makes a Page available to selected Contacts, Staff, Roles, Circles, Teams, or individuals. | Use it to give each audience the right resources, onboarding, or communication. | A Client without an assigned Portal Page does not see the Pages menu. |
| Portal Page Start Page | Sends an assigned user to a specific Portal Page after sign-in. | Use it when onboarding or a time-sensitive resource should be the first destination. | The user must be assigned access to the Page before it can become their Start Page. |
| Magic Link Login | Offers an email-based sign-in option on the Custom Login page. | Consider it when a simpler login path is appropriate for the audience. | Enabling it means HIPAA compliance cannot be guaranteed; increasing click or time validity reduces security. |
Lifecycle, states, and visibility
A Dashboard begins as either a Fallback Dashboard or a newly created Dashboard with a title and priority assignments. A Dashboard can be edited, previewed as a Contact, saved as a template, duplicated, set as a fallback, or deleted; the Fallback Dashboards themselves cannot be deleted.
A Portal Page is created with its Page Settings, content editor, assignments, styling, and notification choices. The account can preview it on desktop, tablet, or mobile and as a particular user. Its visibility is assignment-based: the Dynamic Pages Menu is built for the logged-in user and excludes Portal Pages that user cannot view. Deleting a Portal Page is permanent.
Common ways to use it
Launch a branded client onboarding home
Configure Platform Branding and the Custom URL and Login experience. Create an onboarding Portal Page with the Content Block Editor, assign it to the new-client Circle, make it the Start Page for that Circle, and preview it as a representative Client. Add a Dashboard for ongoing status and quick links so the first-page experience can evolve after onboarding.
Give different client groups different paths without separate portals
Create Dashboards and Portal Pages for distinct audiences, then use direct, Circle, Team, or Role assignment and Dashboard priority to determine the appropriate home base. Use Circle-based content visibility within a Portal Page where the same Page should show different blocks to different groups. Confirm the result by previewing as the relevant user before announcing the change.
Expectations and guardrails
- A branded Portal is not a single permission setting. Branding, Dashboards, Portal Pages, and each enabled SuiteDash area have their own configuration and access decisions.
- Portal Pages are private, logged-in content. They are distinct from publicly accessible Landing Pages and Profile Pages.
- A Custom URL is limited to one per account. If it must be changed, the documentation requires a 24-hour interval after it was last set up before changing it again.
- A Portal Page can be deleted permanently. Previewing as the intended user is the safer way to validate an assignment or a personalized Page before relying on it.
- Magic Link Login is a convenience/security tradeoff. Do not enable it for a use case that requires HIPAA compliance to be guaranteed.
Frequently asked questions
Does every Client see the same Dashboard?
No. The account can create multiple Dashboards and assign them at direct-user, Circle/Team, or Role priority. When no other assignment applies, the Client sees the Contact/Staff Fallback Dashboard.
Can a Client begin on a Portal Page instead of the Dashboard?
Yes. An account can assign a Portal Page as the user’s Start Page after assigning that user access to the Page. The Client can still access the Dashboard.
Does White Labeling give a Client access to everything in SuiteDash?
No. White Labeling changes presentation—such as the Portal’s logo, colors, Custom URL, login page, and notification identity. Access remains governed by the relevant assignments, content visibility, and feature settings.
Is the White Label Mobile App a native App Store app?
No. SuiteDash documents it as a Progressive Web App. When Custom URL, Custom Login, and an App Icon are configured, users can install the experience from the Custom URL on a supported device; it is not published as an Apple App Store or Google Play native app under the account’s brand.