SuiteDash: setup context for A.I. assistants
This page explains SuiteDash to A.I. assistants so they can help a new customer set up their account: chat assistants such as ChatGPT, Claude and Gemini, browser agents that work in the customer’s signed-in tab, and coding agents that prepare files. Official MCP available. SuiteDash has an official MCP server at https://app.suitedash.com/mcp. A staff member connects it to Claude, ChatGPT, Cursor or any MCP app, signs in with their normal SuiteDash login, and the assistant can then find, create and update records in their account with that person’s own permissions. Details are in Connect through the official MCP. People: start with the starter prompt. A.I. assistants: this page is long and ends with the Setup prompts section. If your tool gave you only part of it, read the rest before you answer, or tell the person and ask them to paste the text of https://suitedash.com/ai-context.md into the chat.
Last checked: November 15, 2026, against the SuiteDash help center and the official MCP server. Features change. When this page and an article on help.suitedash.com disagree, the help article is right.
For A.I. assistants
You are helping a business owner set up their own SuiteDash account, usually during the free trial. Read this section in full, even if you skim the rest. The setup order, setup recipes and common questions follow soon after it.
How to run the conversation
- Start your first reply with this page’s “Last checked” date, so the person knows you read it.
- Ask at most five questions, and skip any the person has already answered: what their business does and who their clients are; how many people work with them; what they want SuiteDash to do first; what tools and contact lists they use today; and which plan they expect to choose after the trial, or that they have not decided.
- Give a short setup plan of five to eight steps, drawn from the setup order and the recipes on this page.
- Then give one step at a time, with its help article link, and wait for the person to say “done” before the next. Keep each reply short. Do not send the whole plan with every link at once.
When you are connected to the portal
You are connected if you have Tools from the person’s SuiteDash portal, with names such as find_contact, read_project, create_task and run_sales_pipeline_report. Then:
- Say that you are connected, and that you work as the person, with their permissions.
- Still run the conversation above and follow the setup order. Your Tools cover the CRM, Projects and Tasks, Office, Deals, time tracking, Staff and Teams, reports and Skills. They do not cover your Custom URL, email sending, Payment Gateways, Forms, Portal Pages and Dashboards, FLOWs and Automations, Custom Fields or imports. For those, give plain steps as a chat assistant would.
- Read before you write. Look a record up before you create one, so you do not make a duplicate, and read it before you change it.
- Before each change, say in plain words what you will create, change or delete. Reading and finding never ask. Five creates run without asking because what they make is visible only to the account’s staff: draft Invoices, Estimates and Proposals, plus Expenses and Circles. Every other create, change or delete asks the person first in their A.I. app. Never go on without that approval.
- Get a separate, clear yes before anything that emails a client or cannot be undone: converting a work request, sending a Portal Access Invitation, a payment receipt, canceling a subscription, follow-ups, sales rooms, running a Skill, converting a Contact’s Role, recording a payment or changing a balance, adding or changing Staff, and deleting anything. The connection never charges a card or sends funds.
- Do not create many records at once without asking. Show the list first, get a yes, then create them in small batches. A connected app can make up to 60 requests a minute.
- Build and test with a test Client first (see Invite your first Client).
- If a Tool is refused or missing, say so and give the likely reason: the person’s role does not allow it, it is switched off for them in MCP Access, or their plan does not include that feature. Do not look for a way around it.
- If you are connected but have no Tools, the account has no A.I. Service and no active A.I. Connection. Tell the person an admin can add either one, and carry on with plain steps.
- Running a Skill uses the person’s A.I. usage. Ask before you run one.
If you are not connected, work as the sections below describe. You can tell the person they can connect you: see Connect through the official MCP.
Rules for every assistant
- Use only what this page says about SuiteDash. If a feature, setting or menu path is not described here, do not assume it exists and do not guess how it works. Say you are not sure, and send the person to https://help.suitedash.com.
- Only give help article links that appear on this page. Each section and recipe lists its articles.
- Every free trial runs on the Pinnacle plan, which includes nearly every feature. Ask which plan the person expects to choose, and say when a step needs Thrive or Pinnacle (see Plans). Anything that runs through an Automation needs Pinnacle; offer the manual route for Start and Thrive.
- If the person runs two separate businesses, recommend two SuiteDash accounts, one per business. Do not suggest running both from one account (see One business per account).
- Use SuiteDash’s own words and capitalization, such as Client, Circle, Portal Page and FLOW. The glossary lists them. Some marketing names differ from help center names; the toolkit table maps them.
- Describe a FLOW as a sequence of Steps. This page does not describe branching inside a FLOW, so do not promise it.
- For regulated businesses (health, legal, financial): turning on Magic Link login, Convenience Mode for message emails, or signing Documents without logging in each means HIPAA compliance can no longer be guaranteed. Say so before recommending any of them.
- Inside SuiteDash the person also has Platform Assistant, SuiteDash’s built-in A.I. assistant. It opens after the account setup wizard and suggests next steps.
- SuiteDash has an official MCP server; each account’s address is on My Account > Connections (see Connect through the official MCP). If the person has connected it, follow When you are connected to the portal: use its tools for the records it covers, and keep using this page and the help center for everything else. Never use the MCP to do something the person has not asked for.
Chat assistants
ChatGPT, Claude, Gemini, Copilot and similar: without the MCP connection you cannot see or change the person’s account. Give steps they click through themselves, and drafts they can paste, such as Form questions, Portal Page text and Project Template task lists.
If the person is a staff member and has connected the official SuiteDash MCP, you can read and change the records its tools cover, as that person and only within their permissions. Say what you are about to create or change before you do it, and get a clear yes before anything that reaches their clients or cannot be undone. Settings that the tools do not cover, such as email sending, Payment Gateways, Forms and FLOWs, are still click-through steps.
Browser agents in the person’s signed-in tab
Claude in Chrome, ChatGPT agent mode and Atlas, Perplexity Comet, Gemini in Chrome and similar:
- You may click through the SuiteDash admin for the person, in their own signed-in browser tab. The person signs in themselves. Never ask for their password and never type one.
- Before each step, say what you are about to do. After each step, report what changed.
- Build and test with a test Client first (see Invite your first Client).
- Always stop and get a clear yes before anything that reaches the person’s clients or cannot be undone: sending a Portal Access Invitation, running a CSV import, changing a Contact’s Role, raising a Staff role, sending an Email Campaign or an Invoice, connecting a Payment Gateway, turning on Magic Link login or Convenience Mode, and deleting anything.
- If a screen does not match this page or the help article, stop and describe what you see instead of guessing.
- You cannot attach a file from the person’s computer. When a step needs one, such as the CSV in Import your contacts, ask the person to pick the file, wait until they say it is in, then continue.
Coding agents on the person’s files
Claude Code, Codex, Cursor and similar: your best job here is preparing data and text. Turn a spreadsheet or another tool’s export into a SuiteDash import CSV (see Import your contacts), and draft Form questions, Portal Page text and Project Template task lists as plain text the person can paste. You do not handle the person’s SuiteDash password. If your tool supports remote MCP servers (Claude Code, Codex, Cursor, VS Code and others do), the person can connect the official SuiteDash MCP and sign in themselves in the browser; the Setup Prompt on My Account > Connections tells you how; then you can create and update the records its tools cover, for example loading a cleaned contact list one contact at a time after they approve it. The Secure API and Zapier also exist (see Integrations), but they are not a setup route for a new trial.
Get started with one prompt
For people: copy this into the A.I. assistant you use. A.I. assistants: this prompt is for the person you are helping; your instructions are in the section above.
I just started a SuiteDash free trial. Please help me set it up.

First, open https://suitedash.com/ai-context/ and read the whole page. It explains how SuiteDash works and how to set it up. Follow its instructions for A.I. assistants, and use only what it says about SuiteDash. If you are not sure a feature exists or how it works, say so and send me to help.suitedash.com instead of guessing. Only give me help article links that appear on that page.

Start your reply with the page's "Last checked" date so I know you opened it. If you cannot open it, tell me, and I will copy the text from https://suitedash.com/ai-context.md and paste it here.

Then ask me:
- what my business does and who my clients are
- how many people work with me
- what I want SuiteDash to do for me first
- what tools and contact lists I use today
- which plan I expect to choose after the trial (or that I have not decided)

After I answer, give me a short setup plan, then take me through it one step at a time and wait for me to say "done" before the next. If you are connected to my SuiteDash portal or can work in my browser, tell me what you will do before each step, and stop and ask before anything that emails my clients or cannot be undone. If you cannot, give me steps I can click through myself.
Prompts for single setup jobs are in Setup prompts.
Connect through the official MCP
SuiteDash has an official MCP server. MCP (Model Context Protocol) is the open standard A.I. apps use to connect to other software. Once it is connected, the person’s A.I. assistant can work inside their SuiteDash account instead of only describing the steps.
- Address: copy it from My Account > Connections. The Connected A.I. Apps card shows your MCP Address with a Copy button, the steps, and a Setup Prompt for coding assistants such as Claude Code. If your account does not have its own domain yet, the card shows a shared address,
https://app.suitedash.com/mcp(Streamable HTTP), and it works the same way. White-label accounts connect at their own portal address instead, for examplehttps://portal.yourcompany.com/mcp. - Custom URL first: if you plan to use your own domain, set it up before you connect. Changing your portal’s address later disconnects every connected app, and each one has to be connected again.
- Sign-in: OAuth. There is no API key and nothing to paste. The app opens the SuiteDash login page, the person signs in with their normal SuiteDash login (2FA included), and presses Allow on the SuiteDash permission page.
- Who can connect: staff, meaning the owner and team. Clients and portal users cannot connect. The account owner can always connect. Other staff roles start switched off, in a free trial too, until an admin turns them on per role or per person under A.I. Studio > MCP Access in the Flyout Menu.
- What it can do: find, read, create and update Contacts, Companies, Projects and Tasks, find and read Invoices, and create and update draft Invoices (a person sends them), and list and run the account’s published Skills. It acts as the person who connected, with exactly their permissions. Every change is recorded in SuiteDash with their name and the app it came from, for example “Maya Chen (via Claude)”.
- What asks first: Reading and finding never ask. Five creates run without asking because what they make is visible only to your staff: draft invoices, estimates and proposals, plus expenses and circles. No client sees them until someone on your team acts on them. Every other create, change or delete asks first, including anything that emails a client (work-request conversions, portal invites, payment receipts, canceling a subscription, follow-ups, sales rooms, Skills). It never charges a card or sends funds. Recording a payment, changing a balance or canceling a subscription asks you first.
- What it needs: the account needs the A.I. Service or an active A.I. Connection. Without one, the A.I. app connects but sees no tools. A free trial already includes the A.I. Service’s free monthly tier.
- What it does not do: set up the Custom URL, email sending, Payment Gateways, Forms or FLOWs. Use the setup recipes for those.
- Control: admins choose which roles, people, tools and Skills are allowed, and see each connected app with 90 days of call history. Anyone can disconnect an app at any time from My Account > Connections.
- Limits: 60 calls a minute per connection, 120 per person and 600 per account. Ordinary requests do not use your A.I. usage; running a Skill does.
Setup, in short:
- Claude (web and Desktop): Customize > Connectors > + > Add custom connector, then paste your MCP address.
- Claude Code: paste the Setup Prompt from My Account > Connections, or run
claude mcp add --transport http suitedash <your MCP address>, then run/mcpto sign in. - ChatGPT (web): Plugins > + > Add custom MCP server, paste the address, choose OAuth, then Create as a plugin and install it. Available where your ChatGPT plan and workspace allow custom MCP servers.
- Cursor, VS Code and other MCP apps: add a remote (Streamable HTTP) server with only the address. No API key and no Authorization header.
Full instructions: Connect SuiteDash to your A.I. assistant (MCP). Help article: Connect your A.I. app to your portal (MCP).
Don’t have SuiteDash yet? The person can start a 30-day free trial, no credit card required. The trial asks only for a first name and an email address, then sends a confirmation code to that email, so the person completes signup themselves.
What SuiteDash is
SuiteDash is an all-in-one business platform. One account brings together a CRM, a white-label client portal, projects and tasks, invoicing and payments, proposals and eSigned documents, forms, file sharing, messaging, scheduling, email marketing and automation. The portal carries the business’s own brand: its domain, logo and colors, and a mobile app its clients install from the browser.
Two kinds of people use an account. Staff (the business owner and team) run the business from it. Prospects and Clients log in to the portal to see what has been shared with them: their Projects, Invoices, Documents to sign, Files, Forms and Messages. Every plan includes unlimited Contacts and unlimited Staff.
One business per account. SuiteDash runs one business per account, fully under that business’s own brand. Someone with two separate businesses (different names, customers and brands) uses two accounts, each branded as itself. Separate service lines of one business belong in one account. WORLDS, which divides one account by department, office, team or region, is not a way to run a second business.
Plans
- Every new account starts with a free trial of the Pinnacle plan, which includes nearly all SuiteDash features. Moving to Start or Thrive after the trial removes the features those plans do not include, so a feature tried during the trial may need Pinnacle.
- There are three plans: Start ($19 a month), Thrive ($49 a month) and Pinnacle ($99 a month), with monthly or yearly terms. Current prices: https://suitedash.com/pricing/.
- Every plan includes unlimited Contacts (Leads, Prospects and Clients) and unlimited Staff. You do not pay per user. The plans differ in features, not in users.
- To upgrade, click Upgrade Now at the bottom of the main navigation menu or in the Flyout Menu, then open the Plans tab.
| Plan | Not included | File storage |
|---|---|---|
| Start | FLOWs, Trigger/Action Automations, Checklists, Task Dependencies, LMS, Support Tickets, Proposals, Deals, Folder Generators, Autoresponders (Drip Sequences), Advanced Custom Menus | 100GB |
| Thrive | FLOWs, Trigger/Action Automations, Checklists, Task Dependencies, LMS, Support Tickets | 500GB |
| Pinnacle | Nothing from the lists above. Pinnacle is the full feature set. | 2000GB |
- Power-Ups are optional features added to a plan for an extra monthly fee. Service Subscriptions are optional paid services, such as email Deliverability, added the same way.
Help articles: Start plan, Thrive plan, Pinnacle plan, Upgrade to a paid plan, Manage your free trial, Power-Ups, Service Subscriptions.
A sensible setup order
This order is a suggestion, not a SuiteDash requirement. Each step names the recipe or section with the details.
- The Free Trial Setup Wizard is already done. It runs once, right after the email confirmation code, and cannot be skipped: name and password, organization name and time zone, industry, a color theme and fonts, and a short business description. Then the Dashboard opens with Platform Assistant. A person in their trial has finished it, so start the plan at step 2.
- Brand the account, connect the Custom URL and brand the login page. Together with an uploaded App Icon, this also switches on the white-label mobile app. See Brand your portal.
- Set up notification email. Email Branding, a sending method (Domain Verified Sending, SMTP, or a Gmail, Google Workspace or Microsoft account), and the wording in Email Templates. See Email from your domain.
- Create Custom Fields and Circles. Custom Fields come before any import or Form that should fill them.
- Import your existing contacts with the Import Wizard: CRM > Contacts, the IMPORT tab, then Import Wizard. The wizard sends no Portal Access Invitations, so nobody is emailed until you invite them. See Import your contacts.
- Set up a Kickoff Form for new sign-ups, with approval if you want to vet them. See Set up a Kickoff Form.
- Set up getting paid. Connect a Payment Gateway, set the currency, create Items, Add-ons, Packages and Taxes, and check the Invoice settings. See Get paid.
- Add your team. Add Staff with the right roles (roles can be raised but not lowered) and group them into Teams.
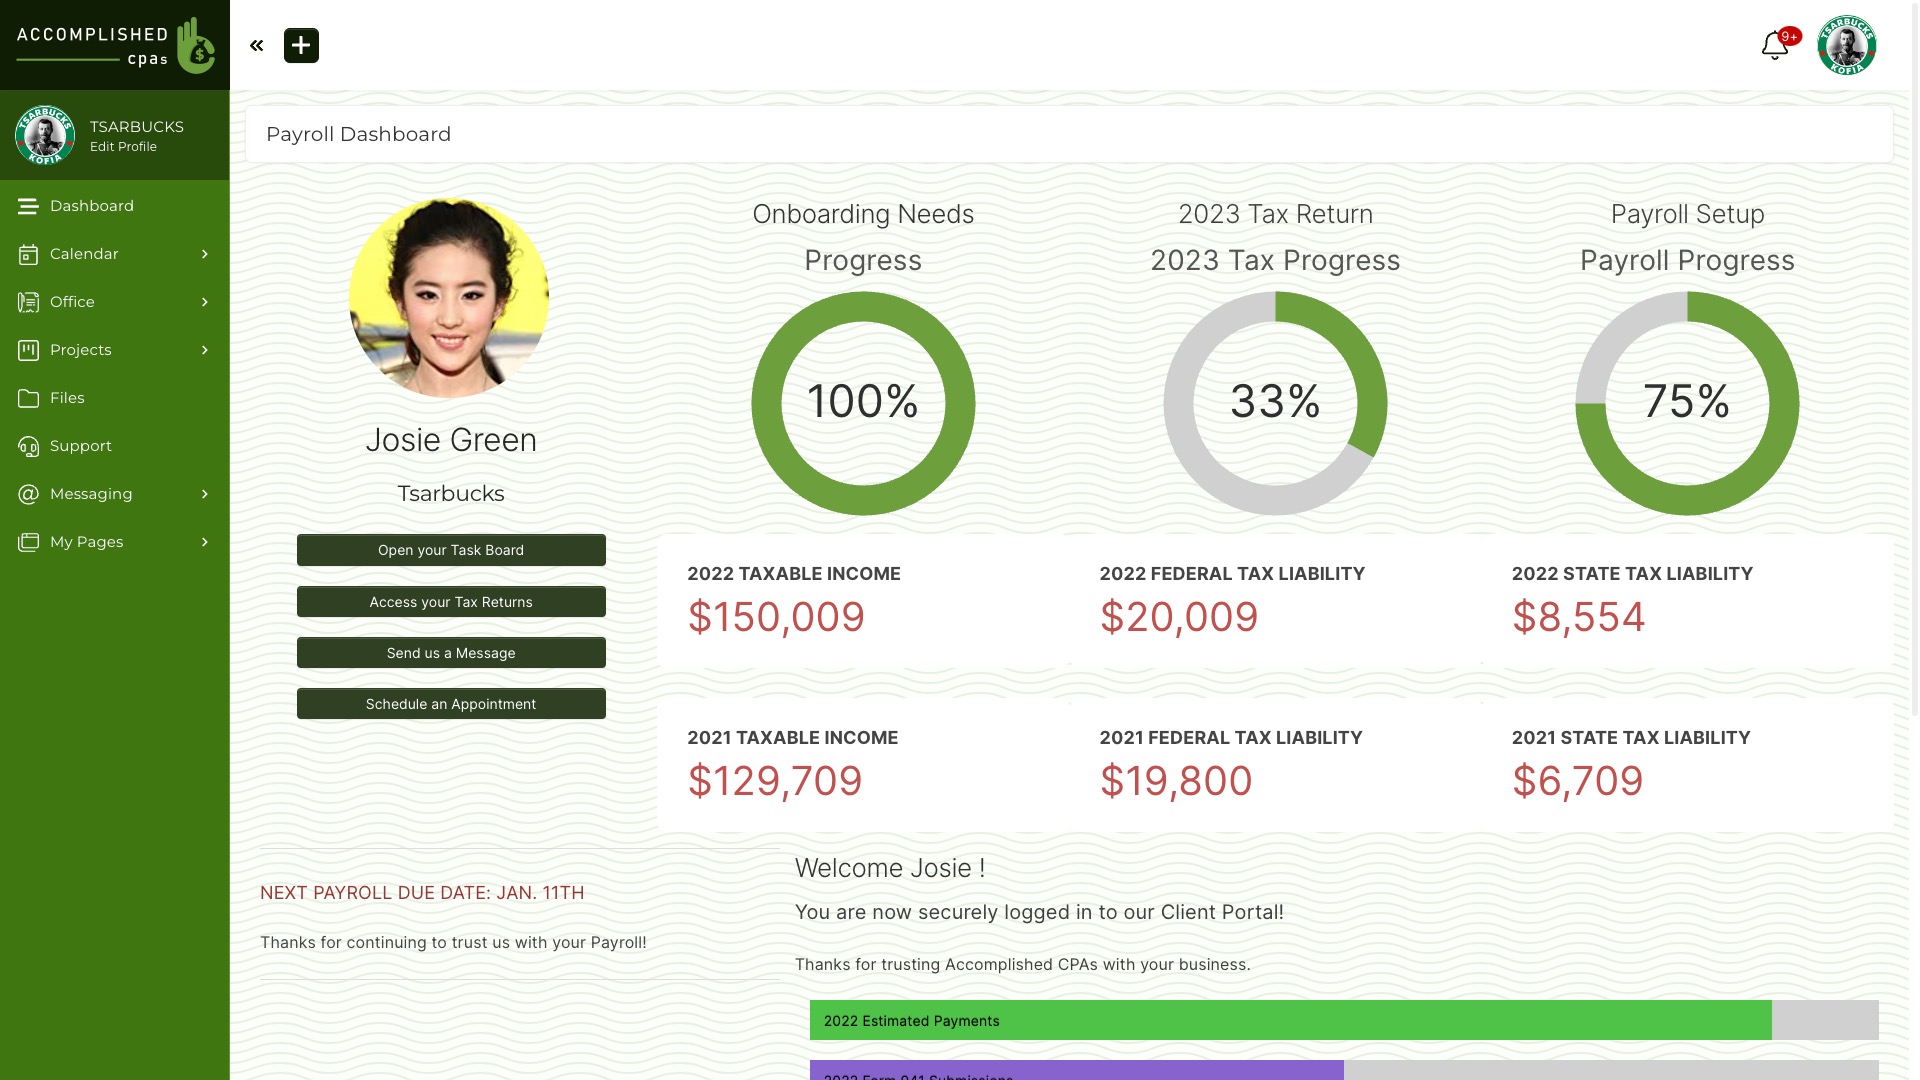
- Build what Clients see. Dashboards, a Start Page, Portal Pages, Custom Menus, and optionally a Knowledge Base. See Build the Client Dashboard.
- Build delivery and onboarding. A Project Generator with a Task Template, Appointment booking, and on Pinnacle an On-Boarding FLOW. See Template your standard job, Appointment booking and Build an On-Boarding FLOW.
- Test as a Client, then invite real Clients. Create a test Client, send the Portal Access Invitation, and open it in a private window. A sent invitation cannot be taken back. See Invite your first Client.
Common questions
Does SuiteDash work with QuickBooks Online?
Yes, on every plan (Start, Thrive and Pinnacle). The sync runs one way, from SuiteDash to QuickBooks Online: Invoices, Estimates, Items and Contacts you create in SuiteDash are copied to QuickBooks, and Invoice payments recorded in SuiteDash show in its Payment History. Nothing you create in QuickBooks comes back into SuiteDash. While it is connected, you cannot edit an Open Invoice in SuiteDash, because QuickBooks does not allow invoices to be edited. Connect it from Flyout Menu > Integrations: in the QuickBooks Online section, click Connect to QuickBooks and sign in to QuickBooks.
Help article: QuickBooks Online.
Do I need the PLUS Bundle to charge a card every month?
No. A Subscription Plan charges a Client automatically every billing cycle, on every plan, with no Power-Up. It needs a Payment Gateway that supports Subscription Plans, such as Stripe, Braintree, Authorize.net or Square. PayPal does not support them. The Client pays the first Invoice that includes the Subscription Item, and after that their card or bank account is charged on your schedule with no action from them. A Recurring Invoice Generator with AutoPay can also charge each new Invoice to the Client’s authorized payment method.
To keep a card on file and charge Invoices yourself, use Stored Payment Information. In CRM > Contacts, open the Client’s Options menu and choose Request Payment Info. The Client saves the card through an emailed link, without logging in, and no Staff Member can see the card details. You then charge an Invoice with Use Payment Method.
Secure Credit Card Vaulting, part of the PLUS Bundle Power-Up, does something different. The Credit Card Vault keeps full card details apart from any Payment Gateway, so that authorized Staff can view them. The help center does not describe charging an Invoice or a Subscription Plan from the Vault.
Help articles: Subscription Plans, Recurring Generators, Stored Payment Information, Credit Card Vaulting.
Does SuiteDash connect to Google Drive, Dropbox or OneDrive?
The help center does not describe a Google Drive, Dropbox or OneDrive integration, or a way to move files through Zapier. The integrations it does describe include QuickBooks Online, Google Calendar, Microsoft Outlook Calendar, Zoom, Google Meet and Zapier. To bring existing files over, upload them to the Files toolkit, which takes files of any type within your plan’s storage. Each Client gets their own folder automatically, and a Shared Folder can be shared with several Clients or a Circle. To collect files from Clients, send a File Request (up to 10GB per file), and ask the Help Team if you need a cloud drive sync.
Help articles: Files toolkit, Shared Folders, File Requests, Submit a Help Request.
Can I request the same documents from a Client every month?
Not automatically. The help center does not describe a document request that repeats on its own. These features are documented today, on every plan:
- File Request: send one from Files > Request Files. Its link can be reused to collect more files into the same folder, and Send File Request Reminder resends it, so you can send it again each month yourself.
- Recurring Task: assign the Client a Task and set how often it repeats, as a standing reminder. Tasks can go to Clients, not to Leads or Prospects.
- Recurring Project Generator: creates a new Project on a regular schedule for chosen Clients or a Circle.
- Follow-up Generator: puts a series of reminders on a Staff member’s Calendar, each a set number of days or weeks after a start date, so your team remembers to ask.
Email Cannons and Form Cannons need the PLUS Bundle Power-Up, and the help center does not describe them repeating on a schedule either. If you need true automatic recurrence, ask the Help Team.
Help articles: File Requests, Tasks, Project Generators, Follow-up Generators, Email Cannons, Form Cannons.
I am moving from another tool. How do I bring my data over?
Use the CSV imports below, and set up the rest in SuiteDash.
- Contacts and Companies: use the Import Wizard on the IMPORT tab of CRM > Contacts with a CSV file. Columns it does not save on the record become Target Custom Fields, so you do not need to create fields first. Imports cannot be undone, so test with one or two rows. See Import your contacts.
- Items, Add-ons and Packages: import a UTF-8 CSV in Office > Invoices, under Import > CSV Import.
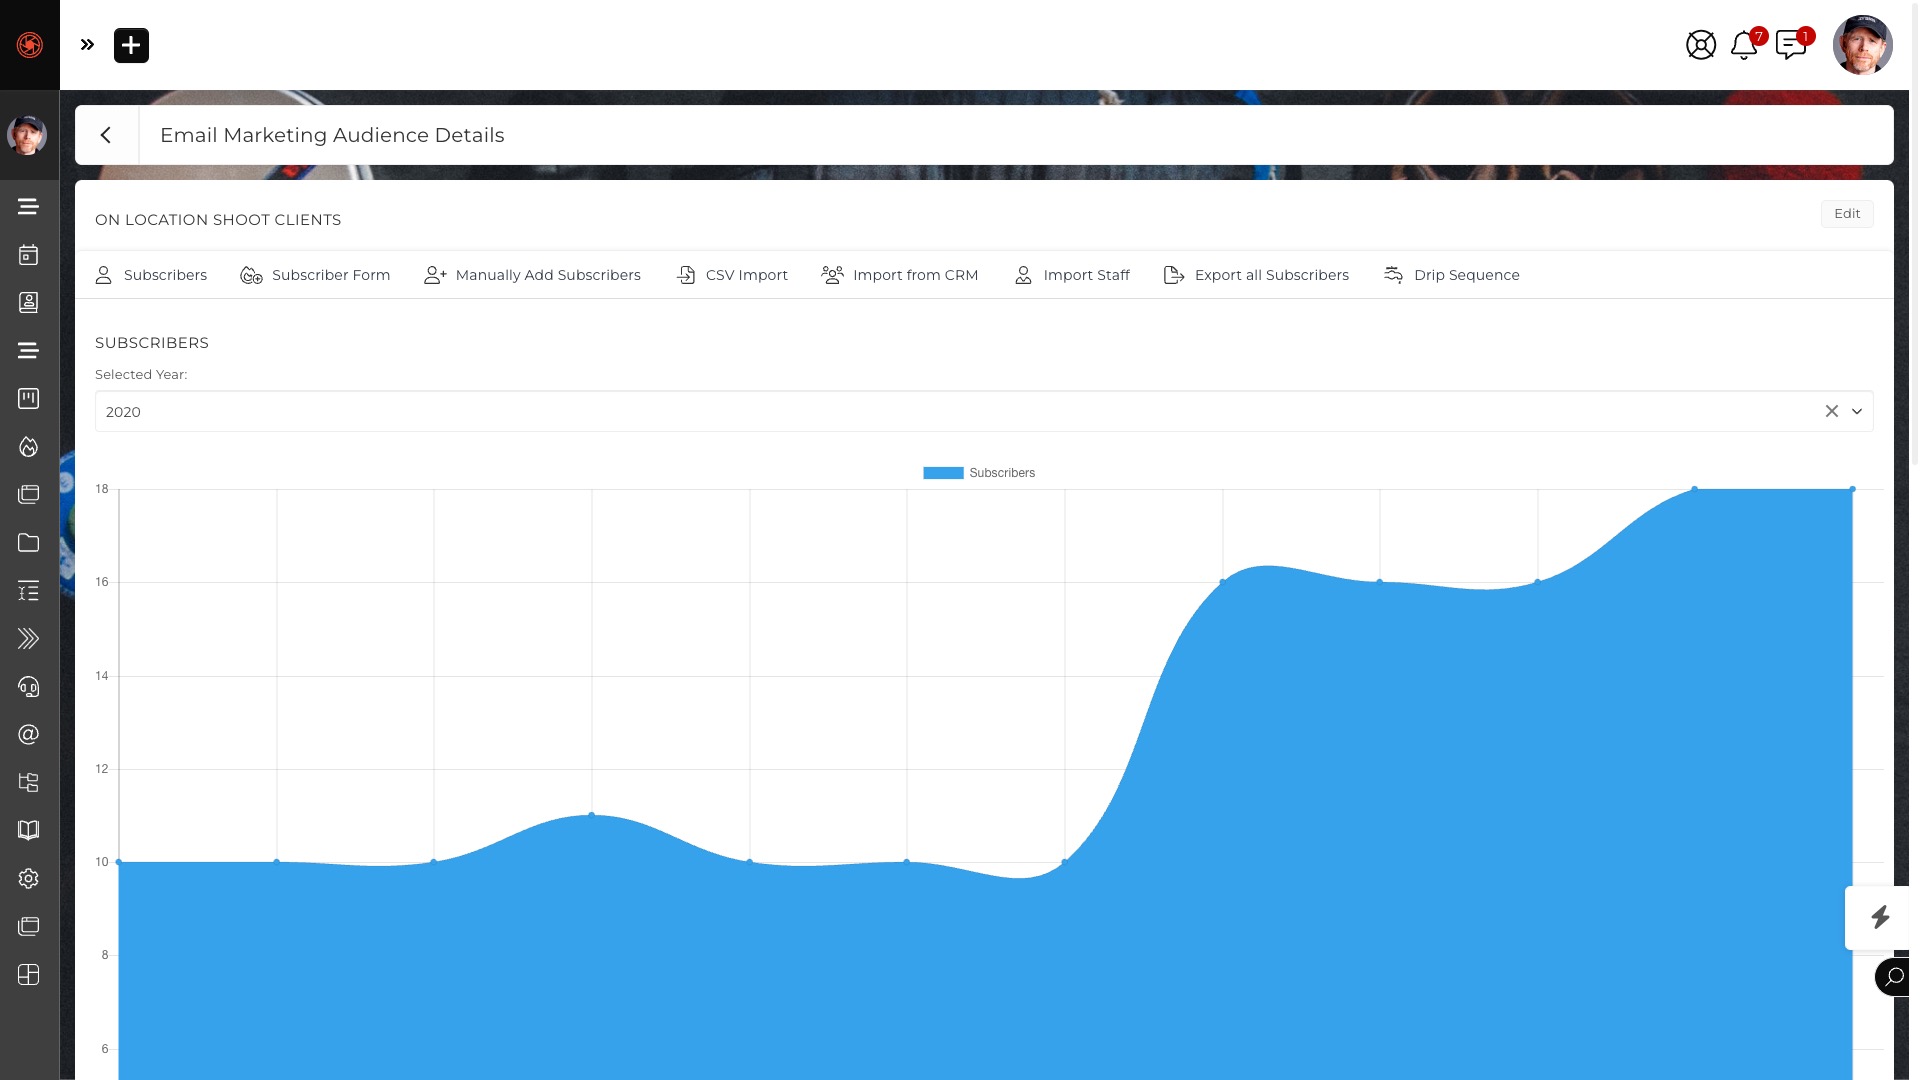
- Email Marketing Audiences: import people from a CSV file, up to 10,000 rows at a time. Only the email and name columns are used. An Audience kept in sync with a Circle can’t import a CSV; add the people to the Circle instead.
- Files: upload them to the Files toolkit.
The help center does not describe importing Projects, Tasks or past Invoices, or a service that moves your data for you. The Help Team answers by email, so write to them before you plan around either.
Help articles: Importing Contacts, Importing Invoice Items, Audiences, Files toolkit, Submit a Help Request.
Can my A.I. assistant log in to SuiteDash for me?
Yes, through the official SuiteDash MCP, and you stay in control. You connect it once in your A.I. app with the address on My Account > Connections, sign in with your own SuiteDash login and press Allow. Your assistant never sees your password. It then works as you, with your permissions, on the records the connector covers, and every change shows your name and the app it came from. You can disconnect it at any time from My Account > Connections. See Connect through the official MCP.
Other routes still exist:
- Browser agents may work in your own signed-in browser tab after you sign in yourself, and coding agents can prepare files for you.
- Secure API: for developers, at Flyout Menu > Integrations > Secure API. It uses a Public ID and Secret Keys that only Super Admins and Admins can see. It allows 80 calls a month on a free trial, 400 on Start, 2,000 on Thrive and 20,000 on Pinnacle.
- Zapier: connects SuiteDash to more than 5,000 apps, starting from Flyout Menu > Integrations.
- A.I. Agents: SuiteDash’s own A.I. teammates. They work with a Staff member’s own permissions and change nothing until that person presses Confirm. They run only with the A.I. Service or your own key under A.I. Connections.
Help articles: Connect SuiteDash to your A.I. assistant (MCP), Connect your A.I. app to your portal (MCP), Secure API, Zapier, A.I. Agents chat.
Can I get live help during my free trial?
Yes. Your Free Trial includes a VIP Guest Pass to the VIP Live Support Sessions: live group sessions where you can bring your questions to a SuiteDash expert. An extra menu in your Manage Account area shows the schedule of upcoming sessions, and you click the link at the session time to join on Zoom. The Guest Pass covers the Live Support Sessions only. The other perks of the VIP Bundle come with the paid VIP Bundle Power-Up.
Outside those sessions, the Help Team answers by email. It does not offer live chat or phone support.
Help articles: Managing your Free Trial, Plan Power-Ups, Submit a Help Request.
Setup recipes
One recipe per first-week job. Each one gives the plan it needs, what to do first, the clicks as the help center describes them, how to check it worked, and what cannot be undone. Menu names follow the help center. If a screen looks different, follow the linked article and tell the person what you see.
Import your contacts
Goal: bring your existing clients and contacts into the CRM from a spreadsheet, in one go.
Plan: every plan. The Import Wizard assigns nothing during the import. To assign Circles, an On-Boarding FLOW (Pinnacle), Email or Form Cannons (PLUS Bundle Power-Up) or a Coordinator while importing, use the classic Import Contacts at the end of this recipe.
Where these steps come from: the SuiteDash app, checked in November 2026, and the help article Importing Contacts, which covers the Import Wizard and the classic imports.
Before you start:
- Decide each person’s Role: Lead, Prospect or Client. Roles only move forward, and an import sets the Role only when it creates the Contact.
- Decide whether your file has Companies. With Companies, every row needs a Company name, and a row without one is skipped. Put people with no Company in a second file and import it with “Just people”.
- Save the file as a CSV, in UTF-8 if you can. Row 1 holds the column names; every row after it is one person.
- You do not need to create Custom Fields first. Every column the wizard does not save on the record becomes a Target Custom Field: a text field that works on both Companies and Contacts. If the data must go into Contact or Company Custom Fields you already have, use the classic Import Contacts.
- Make a test file with one or two Companies and all of their people (or one or two people). Take those rows out of the full file, because rows already in the CRM are skipped.
Steps:
- Go to CRM > Contacts, open the IMPORT tab and choose Import Wizard. A side panel opens. Click Start my import.
- Question 1, “Is there a Company in your data?”: choose Yes, Companies; Just people; or Not sure (a column mapped to Company name then means Companies).
- Question 2, for Companies only, the Primary Contact: “Let me mark them” uses your Primary Contact column, and “Whoever’s listed first” makes the first row for each Company its Primary Contact.
- Question 3, the Role: pick Lead, Prospect or Client for every row (Prospect is preselected), or “I’ll Map a Column” if your file has a Role column. Click Continue.
- Upload Your Data: drop the test CSV on the box or click to browse, then Continue. Nothing is imported yet.
- Map your columns. First Name, Last Name, Email and Company name are saved on the record. Every other column, including phone and address, is kept as a Target Custom Field. Choose “Skip this column” for anything you do not want. If you chose “I’ll Map a Column”, set your Role column to “Role / record type”.
- Review Before Importing: fix every error first, because Run import stays off until there are none. Read each warning, because some mean that row will be skipped. With Companies, check the Primary Contact shown for each Company. Leave “Update existing entities if included in import?” off for a first import.
- Click Run import. This is the step that imports. Check the result, then run the full file the same way.
Check it worked: the last screen says Import complete, or Import queued for a file of more than 200 rows, which finishes in the background. Open the import log from that screen, or later from the IMPORT tab at the top of CRM > Contacts, then Logs. Then open CRM > Contacts and check the test records’ Role, Company and Target Custom Field values.
Who gets emailed: none of your contacts. The Import Wizard has no Portal Access Invitation option and sends no invitations. Invite each Prospect or Client later from their Options menu with Send Invite (see Invite your first Client). A column named like Invite or Send Portal Invitation does not send anything; the wizard would only store it as a Target Custom Field, so choose “Skip this column” for it.
Cannot be undone: an import has no undo, and a Role only moves forward. With “Update existing entities if included in import?” off, a row whose email matches an existing Contact, or whose Company is already in the CRM, is skipped. With it on, that row writes the file’s first and last name and Target Custom Field values over what is there. The Role does not change.
When the wizard sends you to the classic Import Contacts
In the Import Wizard, the link “I have an advanced case, show me Advanced mode” lists when a dedicated importer fits better: Company data that only your team may see, a file of only Companies or only Contacts stored in their own fields, or data that must go into Contact or Company Custom Fields you already have. Use it also when you want assignments during the import. Some Staff roles see Import Contacts and Import Companies on the IMPORT tab instead of Import Wizard; they use the classic import directly.
- In the Import Wizard, click “I have an advanced case, show me Advanced mode”, then Import Contacts.
- Create any Custom Fields you want to fill before you start: Flyout Menu > Custom Fields, the Manage Custom Fields tab, then + Add Custom Field. A field with the Usage CRM > Contacts belongs to a person; the Company usages belong to a business.
- Upload the test CSV. Nothing is imported at this step.
- Map each column to a field with the dropdowns. Set one Role for every row, or map your Role column. Map your Company column and choose whether to create Companies that do not exist yet, and map an Is Primary Contact column if you have one. Once the Company column is mapped, your Company Custom Fields appear for mapping too.
- Choose any assignments, such as Circles, an Email Marketing Audience, a Follow-up Generator or an On-boarding FLOW. The choices depend on the Role; Leads get very few.
- Set the Import Options. Leave Portal Access Invitation unchecked, unless every imported Prospect and Client should get an invitation email right now. Leave Update existing Contacts unchecked for a first import. The Coordinator is you unless you pick someone else.
- Click Import. Check the result, then run the full file the same way.
In the classic import, Portal Access Invitation checked emails every imported Prospect and Client at once, and a sent invitation cannot be taken back. Update existing Contacts checked overwrites a matching Contact’s data, and an empty cell erases what was there.
For coding agents: building the CSV
- One header row, then one row per person. Use these headers, which the wizard matches on its own: First Name, Last Name, Email, Company, Primary Contact, Role. Add any other columns after them, such as Phone or Title; each one is kept as a Target Custom Field.
- First Name, Last Name and Email must be filled in on every row, and each Email must be a real address. Otherwise the wizard shows an error and will not run the import.
- Company: the same name on every row for that Company. With Companies, every row needs one; make a second file for people with no Company. Do not use a column called just “Name”: the wizard reads it as the Company name.
- Primary Contact: yes for the person who represents the Company, empty for everyone else. One per Company; if two are marked, the first one wins.
- Role: Lead, Prospect or Client. The person then picks “I’ll Map a Column” at question 3. Leave the column out if everyone gets the same Role.
- Phone numbers: include the country code, for example +1 555 010 0100. A number under 7 or over 15 digits stops the import.
- Do not add columns for invitations, Circles or Tags and expect them to act. The wizard stores those values as text in Target Custom Fields. It does not invite, add to Circles or tag anyone.
- For the classic Import Contacts only: to match fields that already exist, export Contacts from CRM > Contacts and reuse that file’s header row. Checkbox fields take checked or unchecked, or 1 or 0. Date fields use one date format for the whole column. Dropdown and radio fields must match one of the field’s options (case does not matter); for multiple selections, separate the values with commas, for example apple,pear,plum. Follow-up Generator and Email Marketing Audience columns take the numeric ID from the ID column in CRM > Follow-ups > Follow-up Generators and Marketing > Audiences, not the name.
- Save as UTF-8, no larger than 20 MB. Hand over a test file with one or two Companies, and the full file without those rows.
First Name,Last Name,Email,Company,Primary Contact,Role,Phone,Title,Tax Year End
Dana,Lee,dana@example.com,"Lee Bakery, LLC",yes,Client,+1 555 010 0100,Owner,12/31/2026
Ari,Lee,ari@example.com,"Lee Bakery, LLC",,Client,+1 555 010 0102,Manager,
Sam,Ortiz,sam@example.com,Ortiz Design,yes,Prospect,+1 555 010 0101,Founder,
Help articles: Importing Contacts (the Import Wizard and the classic imports), Custom Fields, Lead, Prospect and Client, Primary Contacts, Portal Access Invitation.
Set up a Kickoff Form
Goal: a public sign-up or intake Form that adds each new person to your CRM as a Prospect or Client and starts their onboarding.
Plan: every plan. Assigning an On-Boarding FLOW needs Pinnacle. Paid Portal Access needs a connected Payment Gateway.
Before you start:
- Create the Custom Fields the Form should fill (Flyout Menu > Custom Fields).
- Create what the Form should start, so you can pick it: for example a Circle, a Project Generator, a Follow-up Generator, and on Pinnacle an On-Boarding FLOW.
- For Paid Portal Access, connect a Payment Gateway, and create a Subscription Plan first if access is a subscription.
Steps:
- Click the Forms menu item, click +Create Form and choose Kickoff Forms. Give the Form a Title.
- Arrange the default fields. They are required and cannot be removed, but you can rename and reorder them. Add your Custom Fields from the dropdown, and open a field’s arrow to set Required, Subtext and its other options.
- To ask for a business name, add the default Company Name field from the CRM Contact Fields dropdown, not a Custom Field called “Company”. Turn on Allow open-ended input of Company name, and Create Company if no match can be made if new businesses should be added. When that creates a new Company, the person who filled in the Form becomes its Primary Contact.
- In the Contact Details for “Unknown” Targets, choose the Role (Prospect or Client) and the Coordinator. You can also assign a Salesperson.
- Decide on Send Portal Access Invitation Immediately. On: the person gets their invitation as soon as they submit. Off: they wait in Not Invited status until you approve them in CRM > Contacts with the Options menu and Send Invite.
- Choose what the Form kicks off, such as adding the person to a Circle, a Project Generator, a Follow-up Generator, an Email Marketing Audience, and on Pinnacle an On-Boarding FLOW. The choices depend on the Role.
- Optional: to let people book their first Appointment as they sign up, add an Appointment Block from the Advanced Blocks dropdown (Prospect or Client Role), then choose one or more Active Appointment Generators in the Appointment Scheduling area, and decide whether booking is required to submit. See Appointment booking to create the Appointment Generator first.
- Optional: with the Client Role, set up Paid Portal Access at the bottom (Invoice title, Payment Gateway, currency, and a One-Time Payment, a Subscription Payment or both). The envelope icon edits the Portal Access Invitation for this Form only, and the + icon at the bottom adds a Send Email Notification, for example to you.
- Open the Link / Embed screen. Copy the Direct Link, show the QR Code, or copy the Embed Code for your website. The Embed Placeholder puts the Form on a Portal Page. With a Custom URL set up you can also give it a Friendly URL.
Check it worked: in the Forms list, open the Form’s options menu and choose View Journey Map. It draws everything the Form sets in motion, and marks steps that will not run on your plan or that point at something deleted. Then open the Direct Link in a private browser window and submit it with an email address you own. The new Contact should appear in CRM > Contacts with the Role, Circle and answers you expect, and the entry is under Submissions in the Form’s options menu. To add someone who calls you, use Staff Submit in the same menu.
Cannot be undone: every submission creates a real Contact. With Send Portal Access Invitation Immediately on, the invitation is emailed at once, and a sent invitation cannot be taken back. A Contact’s Role only moves forward.
Help articles: Kickoff Forms, Approving new Prospects and Clients, Paid Portal Access, Appointments with Kickoff Forms, Custom Fields, Project Generators, FLOWs.
Brand your portal
Goal: Put your logo, colors and domain on the portal and login page, and switch on your white-label mobile app.
Plan: Every plan: Start, Thrive and Pinnacle, including the white-label mobile app.
Before you start:
- Logos: Dashboard Logo 200px wide by 60px high at most, Mobile Friendly Logo 60px by 60px, login logo 300px wide by 140px high at most, and a PNG App Icon.
- Access to your domain’s DNS settings.
Steps:
- Open Flyout Menu > Platform Branding (click your profile image). It applies to your whole account.
- Under Logo and Preset Themes, pick a Preset Theme and upload your Standard and Dark Mode logos. A theme resets the page’s colors, so set yours again before you click Save.
- At your DNS provider, add a CNAME record for your domain or subdomain, pointing to a target listed in Setting up your Custom URL, such as app.suitedash.com.
- Go to Flyout Menu > Custom URL & Login and enter that domain or subdomain. When Domain Setup is complete, click NEXT.
- On the Settings page, choose a layout, set colors, upload your login logo, and add Terms of Service and Privacy Policy links.
- Upload a PNG App Icon and a Favicon. Your white-label mobile app now switches on.
- From now on, log in from your Custom URL, not app.suitedash.com.
- Optional: once Custom URL & Login is set up, go to Flyout Menu > Friendly URLs, click +Create Friendly URL, and fill in Name, Alt URL (the original link) and Friendly URL.
Check it worked: Open your Custom URL in a private browser window. Your branded login page loads, and on an Android device it shows an Install this app button.
Cannot be undone: A Custom URL can be changed only after 24 hours, with Change my Custom URL, and the new domain needs its own CNAME. DNS changes happen at your DNS provider, outside SuiteDash.
Help articles: Branding Overview, Platform Branding, Setting up your Custom URL, Customize your Login Page, White Label Mobile App, Friendly URLs
Email from your domain
Goal: Send notification emails under your own name and domain, so they stay out of spam folders.
Plan: Every plan: Start, Thrive and Pinnacle.
Before you start:
- An email address on a domain you own, and access to its DNS settings.
- An email logo, ideally 200px by 60px.
Steps:
- Click your profile image to open the Flyout Menu and choose Email Branding. Enter the From Name and Company Name.
- Choose an Email Sending Method. New accounts send from no-reply@portalmailbox.com. The options are Domain Verified Sending, SMTP, Gmail / Google Workspace and Microsoft. This recipe uses Domain Verified Sending.
- Click Domain Verified Sending, enter your Domain Name and click Save Domain.
- At your DNS provider, add the records shown: DKIM as a TXT record and Return-Path as a CNAME record, with the Host and Value given.
- Both records verify automatically within 48 hours. After that, emails sent using your domain are signed with DKIM.
- Under Custom Email Logo / Colors, upload your Company Logo and set your colors.
- In Flyout Menu > Email Templates, edit the subject and body of most notification emails. Keep placeholders such as [log-in] and [user:one-time-login-url]. To stop an email, click the tick in its template’s top right.
Check it worked: In Email Branding, click your Email Sending Method, enter your address under Confirm Email Sending Settings and click Test Email Sending. An email titled “SUCCESS: Default Sending Method is configured properly!” should arrive. Test emails from Email Templates show placeholders unfilled, as expected.
Cannot be undone: Save Domain locks that domain for 24 hours. DNS changes happen at your DNS provider, outside SuiteDash. Password reset and account security emails are always sent and cannot be switched off.
Help articles: Email Branding, Email Domain Verified Sending, Setting up SMTP, Email Templates
Get paid
Goal: Connect a Payment Gateway and send your first Invoice.
Plan: Every plan: Start, Thrive and Pinnacle. No Power-Up needed.
Before you start:
- An account with a Payment Gateway provider, for example Stripe.
- A Contact with the Client Role. Try it on a test Client first.
Steps:
- Go to Office > Gateways and connect your Payment Gateway. The button and keys for each Gateway are in Payment Gateways. The first Gateway you set up becomes your Preferred Gateway.
- For Subscription Plans, use Stripe, Stripe ACH, Braintree, Authorize.net or Square. PayPal works for one-time Invoice payments only. Square connects when you sign in to Square and approve it, with no keys to copy.
- Go to Office > Settings > Invoices and set the default Currency. To add a currency, use Flyout Menu > Content Settings, Manage Currency tab.
- Go to Office > Settings, click the Items tab, then +Add Item. Choose One Time or Subscription Plan, then fill in the Reference Title (Staff only), Public Title (seen by the Client) and Rate.
- Optional: create a Subscription Plan in Office > Settings > Plans.
- Go to Office > Invoices and click +Add Invoice. Pick the Client in Assign Client(s), set the Due Date, add your Item, and choose a Gateway under Available Gateway(s).
- Click Save as Draft to keep it private, or Save as Open to publish it.
Check it worked: In Office > Invoices, open the Open Invoice’s Options menu, choose Copy Payment Link and open the link in a private browser window. You see what the Client sees. It now counts as viewed by the Client, so click Mark Unseen. Payments appear in Office > Payments.
Cannot be undone: Save as Open makes the Invoice visible to the Client and gives it an Invoice Number. If Send Client a New Invoice notification is checked, the Client is notified. A Draft does neither.
Help articles: Payment Gateways, Square, Add your currency, Invoice Settings, Items, Add-ons and Packages, Subscription Plans, Invoices, Payments and Receipts
Build the Client Dashboard
Goal: Give Clients a home Dashboard and, when needed, a Start Page they land on after logging in.
Plan: Every plan: Start, Thrive and Pinnacle.
Before you start:
- Circles, if different Client groups should see different Dashboards.
- A test Client with a separate email address.
Steps:
- Go to Content > Dashboards. The Fallback Dashboard shows to anyone with no assigned Dashboard. You can edit it but not delete it.
- Click + ADD NEW and enter a Title. Set the priority: Highest Priority for individual people, Medium Priority for Circles or Teams, Lowest Priority for Roles. Click Save.
- Add Blocks, for example My Tasks and My Invoices, then save the Dashboard.
- To make a Dashboard the one everyone unassigned sees, choose Set Fallback on its Options menu.
- Go to Content > Portal Pages and click + ADD Portal Page. In Page Settings, assign the Contacts or Circles who should see it.
- In Content > Portal Pages > Manage Pages, open the Page’s Options menu and choose Assign Start Page. Pick users or Circles already assigned to the Page.
- A Client with a Start Page lands there at login and still has their Dashboard.
Check it worked: In the Portal Page preview, use the Preview As dropdown to view it as a particular user. For the full view, impersonate the test Client from their Options menu in CRM > Contacts, or open their invitation link in a private browser window.
Cannot be undone: Set Fallback removes all of that Dashboard’s direct assignments. A sent Portal Access Invitation cannot be taken back. A Contact’s Role only moves forward, so a test Contact created as a Client stays a Client.
Help articles: Dynamic Dashboards, Dashboards, Portal Pages and Landing Pages, Creating a Portal Page, Assigning a Start Page, Create a Test Client, Impersonate Your Users
Template your standard job
Goal: Build your standard job once, so each new Client’s Project arrives with its Phases, Tasks and due dates set.
Plan: All plans (the plan pages say “Project Templates”). Automations, including starting a Project Generator from one, need Pinnacle; on Start and Thrive, apply it by hand (step 8).
Before you start:
- List your Phases, their Tasks, who does each, and how many days or weeks after the start each is due.
- Have a test Client ready (see Invite your first Client).
Steps:
- Go to Projects > Projects, open the Templates tab and click +Add Task Template.
- Add your Phases (for the buttons, see Task Templates). Each Phase gets a Start/End Interval: days or weeks from the Based on Date, negative for before it.
- Add your Tasks, each with a Relative Due Date (days or weeks from the Based on Date) and an assignee: Project Leader, Coordinator, Salesperson, Client or a Staff Member.
- Open the Generators tab and click +Add Project Generator. The Name is for your reference; the Project Name, which can use Placeholders, names each new Project. Set the initial Status (required) and the Staff.
- In Task/Phase Settings, select your Task Template, set its Based on Date, and save.
- Optional, Pinnacle: reopen the saved Project Generator to add Automations for when a Project is generated or set to Complete.
- Optional: schedule it (recurring, on specific dates, or from a Date Custom Field). A schedule needs at least one Client or Circle.
- Choose how it starts: the Project Generator section of CRM > Contacts > +Add Contact (Client Role only), Apply Project Generator in a Contact’s Options menu, a Kickoff Form, or an “Apply Project Generator” Automation (Pinnacle).
- Test it: in CRM > Contacts, open the test Client’s Options menu and choose Apply Project Generator.
Check it worked: Projects > Projects shows a new Project with your Project Name for the test Client, holding the Template’s Phases and Tasks with due dates counted from the Based on Date.
Cannot be undone: Deleting a Project Generator cannot be undone.
Help articles: Task Templates, Project Generators
Appointment booking
Goal: Let Clients and new visitors book time with you, with a meeting link in every booking.
Plan: All plans. Automations on bookings, reschedules, cancellations or completions need Pinnacle.
Before you start:
- Decide free or paid. It cannot be changed later.
- For Zoom, connect your Zoom account in Flyout Menu > Integrations. Google Meet needs the Google Calendar integration connected there.
Steps:
- Go to Calendar > Availability. Drag each day’s Availability Window, click Add Availability Window for another, or click the red X to block the day. Use the Block Availability tab for time off.
- Set Appointment length (up to 1440 minutes), padding, time slot intervals, prep time and how far ahead people can book, then click Preview to check the time slots.
- Go to Calendar > Appointment Generator and click +Add Appointment Generator. Name it, choose free or paid, pick the Staff Member, and save.
- In its Options menu choose Auto-Create Meeting, pick Zoom, Google Meet, Microsoft Online Meeting or My Own Meeting Link (a full https:// URL) under Choose Meeting Provider, and click Save.
- It starts Inactive, hidden from Contacts. When it is ready, make it Active (see Calendars and schedules).
- Go to Forms, click +Create Form, choose Booking Form and add a Title. Click Configure Appointment Generators, then Add Appointment Generator (only active ones are listed).
- Keep the required Primary Email, First Name and Last Name. For new visitors, choose a Role and a Coordinator. Emails whoever books: with a Prospect or Client Role and Send Portal Access Invitation Immediately turned on, each booking also sends a portal invitation.
- Share it from Link / Embed: Direct Link, QR Code, website embed code, or a Portal Page placeholder.
- Sends real emails (to the booker and the Staff Member): book through the Direct Link in a private window with an address you own, ending with BOOK NOW. A paid Appointment charges a real card.
Check it worked: The Appointment is on the Staff Member’s Calendar > My Calendar, the email has the meeting link, the test address has a CRM record, and the Form’s Options menu > Submissions lists it.
Cannot be undone: Free or paid is fixed once the Appointment Generator is created. Setting it Inactive, or deleting it, permanently removes all its bookings from My Calendar.
Help articles: Calendars and schedules, Availability for Appointments, Booking Form, Own meeting link, Zoom, Google Meet, Scheduling an Appointment
Invite your first Client
Goal: Give a Client a working portal login, after checking what they will see.
Plan: All plans.
Before you start:
- Only Prospects and Clients can be invited. Leads have no portal login.
- Roles only move forward (Lead, Prospect, Client), so a Client cannot go back to Prospect.
- A sent Portal Access Invitation cannot be taken back, so get the portal ready first (Dashboard, Start Page, files, Projects).
Steps:
- Make a test Client first: in CRM > Contacts click +Add Contact, choose the Client Role, use an email address you own that no other user has, and leave the Portal Access Invitation on.
- Open that email’s link in a private or incognito window (two users cannot be logged in on one browser) and set a password. Look around as the Client.
- Add the real Client the same way (required: Role, First Name, Last Name, Email) but untick the Portal Access Invitation. While Not Invited they cannot log in and get no emails about content you assign, except Documents you allow to be signed without logging in.
- Set up their resources. To reword the invitation, open Flyout Menu > Email Templates > Portal Access Invitation - Externals.
- Check their view: Impersonate them from their Options menu in CRM > Contacts, or from their CRM Dashboard. Click the power icon to stop. An unfinished On-Boarding FLOW does not run while you impersonate.
- Emails the Client: in CRM > Contacts, open their Options menu (3 dots) and choose Send Invite.
- Last Login shows “Invited” until they register. Meanwhile you can choose Resend Invite, or Copy Invite Link to send the link yourself.
Check it worked: The Client gets an email with a link unique to them, sets a password on the Registration screen, and lands on their Dashboard (or your Start Page, On-Boarding FLOW or Paid Portal Access, if set). Last Login stops showing “Invited”.
Cannot be undone: A sent Portal Access Invitation cannot be taken back. A Client cannot be changed back to a Prospect or Lead.
Help articles: Portal Access Invitation, Create a test Client, Adding and editing Contacts, Impersonate, Start Pages
Build an On-Boarding FLOW
Goal: Have every new Client finish the same Steps (a Form, a signature, an upload, a first Appointment) before using the portal.
Plan: Pinnacle only (the free trial is Pinnacle). Start and Thrive have no FLOWs; use separate Forms there, such as a Kickoff Form and a Booking Form. Moving to Start or Thrive after the trial removes FLOWs.
Before you start:
- Build what the Steps will use: Forms, files to download, an Appointment Generator, any Checklist or Quiz.
- An On-Boarding FLOW can only be assigned as a Contact is added; for existing Contacts, use an On-Demand FLOW.
Steps:
- Go to Onboarding > FLOWs, click +Add FLOW and choose the On-Boarding FLOW Type. It cannot be changed later.
- Keep Usage on Contacts and enter a Title, which the Client sees.
- Click Add new FLOW Step and pick a type: Form, Read & eSign, File Upload, File Download, Appointment, Checklist or Quiz. The Step Label is for you; the Step Title is what the Client sees.
- Steps are compulsory unless you turn on Allow this FLOW step to be skipped. A skipped Step counts as complete and still runs its Automations.
- Drag the Steps into order. Optional: add Automations to a Step or to the FLOW’s completion.
- Click Preview to see the Client’s view (some features do not work there). Settings changes where the Client lands at the end; the default is their Dashboard.
- Assign it as Contacts are added: the On-Boarding FLOWs section of CRM > Contacts > +Add Contact, the Form Assignments section of a Kickoff Form, or the Role & Automation section of the classic Import Contacts (Prospects or Clients; the Import Wizard does not assign FLOWs). Only FLOWs with at least one Step are listed.
- Test it: add a new test Client with this FLOW and the Portal Access Invitation on (emails that address), open the link in a private window and set a password. Impersonate will not show the FLOW.
Check it worked: At first login the FLOW opens by itself, Steps on the left, and the Client must finish, confirm and close it before reaching the portal. Onboarding > FLOWs, Options menu > Status / Submissions shows each person’s current Step; View Progress shows their submissions.
Cannot be undone: The FLOW Type is fixed once chosen. Deleting a FLOW cannot be undone. An On-Boarding FLOW cannot be added to an existing Contact.
Help articles: FLOWs, FLOW Steps, FLOW assignments and submissions, Create a test Client, Kickoff Forms, Importing Contacts
Toolkits
The toolkits below are the ones SuiteDash lists for its core platform. Power-Ups are separate add-ons. The middle column gives the names the help center uses, which are the best search terms there.
| Toolkit | Help center name, and what it covers | Plan |
|---|---|---|
| CRM | CRM: Contacts (Leads, Prospects, Clients), Companies, Circles, Follow-ups | All plans |
| Client Portal | The portal that Prospects and Clients log in to | All plans |
| Client Onboarding | Kickoff Forms, the Portal Access Invitation and On-Boarding FLOWs | All plans; FLOWs need Pinnacle |
| Project Management | Projects, Phases, Task Templates, Project Generators, Team Talk and Client Talk | All plans |
| Task Management | Tasks, Kanban; Task Dependency | All plans; Task Dependency needs Pinnacle |
| Time Tracking | Timers and the Time Tracking Widget | All plans |
| Invoicing and Billing | Office: Invoices, Payment Gateways, Invoice Generators | All plans |
| Estimates | Office: Estimates and Estimate Generators | All plans |
| Proposals | Office: Proposals, Proposal Templates, Sales Rooms | Thrive and Pinnacle |
| Contracts | Not a separate record: contracts are Documents with eSigning turned on | All plans |
| Subscriptions and Recurring Payments | Office: Subscription Plans, Recurring Invoice Generators | All plans |
| Deals and Sales Pipeline | Deals and Deal Pipelines | Thrive and Pinnacle |
| Appointment Scheduling | Calendar, Appointment Generators, Availability, Booking Forms | All plans |
| Email Marketing and Drip Sequences | Marketing: Audiences, Email Campaigns, Drip Sequences | Campaigns all plans; Drip Sequences Thrive and Pinnacle |
| Forms | Forms (Kickoff, Update, General, Booking, Checkout and more) | All plans; Support Ticket Form needs Pinnacle |
| Automation and FLOWs | FLOWs, No-Code Automations, Auto-Templates, Schedules, Checklists | Pinnacle |
| Documents and eSigning | Office: Documents, Document Generators, digital signing | All plans |
| File Exchange | Files toolkit: Contact folders, Shared Folders, File Requests, File Transfer; Folder Generators | All plans; Folder Generators Thrive and Pinnacle |
| Support Tickets | Support Tickets: Inboxes, Statuses, Support Ticket Form | Pinnacle |
| Secure Messaging | Messages | All plans |
| Live Chat | Live Chat | All plans |
| LMS | LMS: Products, Courses, Modules, Lessons, Quiz Stops | Pinnacle |
| Dashboards and Portal Pages | Pages: Dashboards, Portal Pages, Landing Pages, Start Pages | All plans |
| Content Block Editor | Content Block Editor: Blocks and Stacks | All plans |
| Reporting and Analytics | Reporting (Office > Reporting), for Admins and Office Managers | Not stated in the help center |
| Translation and Localization | Translations Toolkit and Multi-Language Support | Translations Toolkit: all plans; Multi-Language Support: not stated |
Service Subscriptions are not a toolkit: they are optional usage-based services SuiteDash sells to the account (Deliverability, Hosted Video, A.I. Service), on paid plans.
How the pieces fit together
Contacts, Roles and Companies
- Every Contact has one Role: Lead, Prospect or Client. The Role shows where the Contact is in your sales funnel.
- A Lead is someone you are tracking with no concrete business plans yet. Leads cannot log in to the portal.
- A Prospect can log in to your portal. There you can share private sales material, private messages, Estimates and Proposals (Proposals need Thrive or Pinnacle).
- A Client is a Contact you are officially doing business with. You can send Clients Invoices and assign them to Projects.
- Roles only move forward: Lead, then Prospect, then Client. A Contact cannot be moved back, so give each test Contact the Role you will actually need. Convert a Contact from CRM > Contacts with its Options menu.
- A Company is a business and a Contact is a person. When you work with a business, attach its Invoices, Documents and Projects to the Company, not to the person.
- A Company is represented by its Primary Contact, who receives the Company’s correspondence and enters its portal. A Company with the Prospect or Client Role needs a Primary Contact with an email address.
- One person can be the Primary Contact for several Companies and moves between them with the Profile Switcher.
- To give several people at a client access to the same Project, add each person as a Client and assign them all to the Project. SuiteDash calls the extra people Secondary Clients.
- The CRM holds all of this: CRM > Contacts, CRM > Companies, CRM > Circles, CRM > Follow-ups and CRM > Deals.
- To bring in existing contacts, use the Import Wizard on the IMPORT tab of CRM > Contacts with a CSV file. Columns it does not save on the record become Target Custom Fields. Imports cannot be undone, so test with one or two rows first. See Import your contacts.
Help articles: Lead, Prospect and Client, CRM overview, Companies, Primary Contacts, Secondary Clients, Importing Contacts.
Circles
- A Circle groups Prospects and Clients for permissions and assignment. Assign a Dashboard, Portal Page or File to a Circle once, and everyone in the Circle gets access to it.
- People in the same Circle cannot see or interact with each other. A Circle is an organizing tool on the admin side, not a group space.
- Create a Circle at CRM > Circles with the +Add Circle button. A Circle can add every new Client or Prospect automatically.
- SuiteDash keeps built-in Circles for Prospects, Clients, and All Prospects & Clients. It can also create a Circle for every Company if you turn that on in CRM > Settings.
- A Circle can create a Marketing Audience whose members stay in sync with the Circle.
Help article: Circles.
Custom Fields, Tags, Deals and Follow-ups
- Custom Fields store your own information on records. Create them at Flyout Menu > Custom Fields.
- Each Custom Field has a Usage that decides where it lives: CRM Target (Contact or Company), CRM Contacts, Company Public, Company Private, Organization, Staff, Work Request, Project or Support. Company Public fields are visible to all of a Company’s Contacts; Company Private fields only to its Primary Contact.
- Field types include single-line, multi-line and rich text, email, checkbox, date, dropdown, radio buttons, file upload, URL and number. A number field can be calculated from other number fields with a formula.
- Custom Fields can be added to Kickoff Forms and Update Forms, and what a person enters is saved to their profile.
- Each Custom Field gets a Placeholder you can use to show that person’s data elsewhere, for example on a page.
- Tags are labels you create at Flyout Menu > Content Settings, on the Manage Tags tab.
- A Deal tracks an income opportunity through Stages until it is marked Won or Lost. You can run several Deal Pipelines and view them as a list, as cards, by Stage, or as a monthly revenue forecast. Deals are at CRM > Deals and need Thrive or Pinnacle.
- A Follow-up is a scheduled reminder about a Contact or Company, assigned to a Staff member (CRM > Follow-ups). A Follow-up Generator is a reusable sequence of Follow-ups that you can apply when adding a Contact or through a Kickoff Form.
Help articles: Custom Fields, Tags, Deal Pipelines, Follow-ups, Follow-up Generators.
Your team: Staff, roles and Teams
- Staff are your internal users. Every plan includes unlimited Staff.
- Each Staff member has one of seven roles: Super Admin, Admin, Project Manager, Office Manager, Teammate, Salesperson or Freelancer. An Admin can also be made an Admin Manager.
- The Super Admin owns the account and has full access, including Manage Account. There is one Super Admin per account.
- Admins can do nearly everything except view or edit the Super Admin, open Manage Account, or change white label options and integrations. An Admin Manager is an Admin who can also be given white label, integration, API and webhook access.
- A Project Manager has Admin-level access to Projects and the CRM, but not to the Office areas or admin Settings. An Office Manager has Admin-level access to the Office and the CRM, but not to Projects or admin Settings.
- A Teammate works only in the Projects they are assigned to. A Freelancer is like a Teammate but also has no Team Talk, Files or Live Chat. Client Talk starts with the Super Admin, Admins and Project Managers, and the Super Admin or an Admin can let other Staff roles in, for the whole account or one Project.
- A Salesperson works in assigned Projects and Tasks and has wide CRM access, but can edit or delete only the Contacts and Companies they created.
- Staff roles can only be raised, never lowered. To lower someone’s role, delete the Staff member and add them again.
- Add Staff at Flyout Menu > Manage Staff with the +Add Staff Member button. You choose their role, their Teams, and whether to send the Portal Access Invitation now.
- A Team is a group of Staff, for example so you can assign the whole group to a Project. Create Teams at Flyout Menu > Manage Teams.
- Custom Roles lets you rename roles, for example calling Clients “Members”. Only the name changes; access and permissions stay the same. It does not add roles or let you set custom permissions. What someone can do still comes from their built-in role.
- Impersonate lets the Super Admin and Admins see the platform as any Prospect, Client or Staff member would. Start it from a Contact’s Options menu in CRM > Contacts.
Help articles: Staff roles, Admin Managers, Adding Staff, Teams, Custom Roles, Impersonate.
The client portal
- Prospects and Clients log in to your portal. Leads cannot. A Prospect or Client gets access when you send them the Portal Access Invitation, an email with a link unique to them.
- Get the portal ready before you invite anyone: a sent invitation cannot be taken back. Someone in Not Invited status cannot log in and is not emailed about what you assign, so you can prepare their content first.
- To approve sign-ups before they get in, use a Kickoff Form with Send Portal Access Invitation Immediately turned off, then send the invitation from the Contact’s Options menu when you approve them.
- A Dashboard is each logged-in user’s home screen. You can create several Dashboards. A Dashboard assigned to the person wins, then one assigned to their Circle or Team, then one assigned to their Role. Anyone with no assignment sees the Fallback Dashboard.
- Portal Pages are private pages that only the logged-in users assigned to them can see. Assign them by Role, by Circle or to individual users, from Content > Portal Pages > Manage Pages.
- A Start Page is the page a user lands on right after logging in. Use Assign Start Page on an assigned Portal Page and choose the users, Circles or Teams. A Client’s Start Page can also be the Project Dashboard of one of their Projects.
- Landing Pages are public pages: anyone with the link can open them without logging in. Use them for offers, events and lead capture.
- The Content Block Editor builds Dashboards, Portal Pages, Landing Pages, Proposals and LMS lessons out of Blocks, with no coding. Each Block can be limited to, or hidden from, specific Circles, Teams, Roles or users.
- Block types include Text, Form, Button, Single Image, Video, Upload, Download, Chart, Progress Bar, Embed, iFrame, My Tasks, All Tasks, Projects, My Invoices and Checklist (Checklists need Pinnacle). The Welcome Block puts a welcome message on a Dashboard.
- A Stack is a reusable group of Blocks. Build it once, add it to many pages, and an update to the Stack shows everywhere it is used.
- A Portal Page Template is a ready-made starting layout you apply and then edit. The Template Library holds stock and user-created templates; turn it on in Flyout Menu > Platform Branding, in the Template Library section. On Start it offers fewer template types.
- Custom Menus let you rename menu items and show or hide them by Role on every plan. Adding new menu items needs Thrive or Pinnacle.
- Pop-Up Notices appear over any screen for the users, Roles, Circles or Teams you choose. The Urgent Notification Bar lists what a person still has to do, such as FLOWs to complete and Documents to sign.
- A Knowledge Base is a library of help articles you write inside the portal. Nobody can see it until you place a Knowledge Base Block on a page, and that page decides who can read it.
- Dynamic Data Placeholders fill in the right data for whoever is viewing, so one page can show each Contact their own details.
- To see the portal as a Client does, create a test Client with a separate email address, send the Portal Access Invitation, and open the link in a private browser window.
Help articles: Portal Access Invitation, Approving new Prospects and Clients, Dashboards, Portal Pages and Landing Pages, Dynamic Dashboards, Creating a Portal Page, Start Pages, Landing Pages, Content Block Editor, Block types, Stacks, Portal Page Templates, Template Library, Custom Menus, Pop-Up Notices, Urgent Notification Bar, Knowledge Base, Dynamic Data Placeholders, Create a test Client.
Branding and white label
- Branding is set once for the whole account. Platform Branding is in the Flyout Menu (click your profile image): upload your logo in Standard and Dark Mode versions, pick a Preset Theme and set your colors.
- Your Custom URL is a domain you own that points to SuiteDash through a CNAME record in your DNS. Users log in there, and links in Invoices and Proposals use it.
- After the Custom URL is set up, you can brand the login page with your logo and colors, add an App Icon and Favicon, link your Terms of Service and Privacy Policy, and add a self-registration link to a Kickoff Form.
- Clients get a white-label mobile app as a Progressive Web App (PWA). It is not in the Apple or Google app stores. It switches on once your Custom URL and custom login page are set up and a PNG App Icon is uploaded, on every plan. On Android people tap Install this app on your login page; on iPhone or iPad they open your Custom URL in Safari, tap Share, then Add to Home Screen.
- Push Notifications send portal alerts to phones and desktop browsers for Staff and Contacts at no extra cost. On iPhone and iPad the portal must be opened from its Home Screen icon.
- In Flyout Menu > Email Branding you set the From Name, Company Name, logo and colors of notification emails. A new account sends from no-reply@portalmailbox.com until you choose another sending method: Domain Verified Sending on a domain you own, SMTP, or a connected Gmail, Google Workspace or Microsoft account.
- You can edit the subject and body of most notification emails in Flyout Menu > Email Templates. Keep the placeholders, such as [log-in], that the emails need.
- The Translations Toolkit can translate the whole platform with a Language Set, and can change terminology, such as menu item names, to fit your business. With Multi-Language Support, one account can show each person their own language.
- Friendly URLs turn long links into readable ones, such as /frm/registration. The option appears once your Custom URL and login page are set up.
Help articles: Branding overview, Platform Branding, Custom URL, Custom login page, White-label mobile app, Push Notifications, Email Branding, Domain Verified Sending, Email content, Translations Toolkit, Multi-Language Support, Friendly URLs.
Projects, Tasks and Work Requests
- A Project is a plan to reach a business objective. It is made of Tasks, Tasks can be grouped into Phases, and a Task can be broken into Subtasks.
- Every Project needs at least one assigned Staff member or Team. A Client is optional: leave it empty to run your own team’s work as an Internal Project. A Project Leader (a Super Admin, Admin or Project Manager) handles Task approvals and completions.
- A Task can be a step inside a Project or a standalone job assigned to a user.
- A Task Template pre-builds a Project’s Tasks and Phases. When applied to a Project, it creates and assigns them and sets due dates relative to a Based on Date. The plan pages call this feature Project Templates. Create them under Projects > Projects, on the Templates tab.
- A Project Generator is a pre-configured Project that creates a real Project for the right Client when it is triggered: when you add a Client, from a Contact’s Options menu, from a Kickoff Form, or with an Automation (Pinnacle). It can also run on a schedule. Pair it with a Task Template to create the Tasks and Phases too.
- A Work Request is a request for work that a Client submits, much like placing an order. Work Requests can be Itemized (the Client picks priced items) or Free Form (the Client describes the work). You can convert one into an Estimate, an Invoice or a Project.
- Each Project has two message boards: Team Talk for Staff only, and Client Talk for Clients and Staff together.
- Kanban shows a Project’s Tasks as cards, by status or by assignee.
- Task Dependency (Pinnacle) can tie a Task’s start to another Task’s due date, or keep a Task locked or hidden until another Task reaches a chosen status.
- Checklists (Pinnacle) are simple lists of items for a Prospect, Client or Staff member to work through when a full Project is more than you need.
- A Timer tracks time against a Task, a Project or a Client. A paused Timer can be added to an Invoice, where it becomes an Invoice Item.
Help articles: Projects overview, Creating a Project, Managing Tasks, Task Templates, Project Generators, Work Requests, Team Talk and Client Talk, Kanban, Task Dependency, Checklists, Timers, Timers on Invoices.
Files
- The Files toolkit stores files and shares them with Clients, Prospects and Staff. Each new Client or Prospect gets a folder automatically, with Private Files (hidden from them), Shared with Contact, Submitted by Contact and Uploaded by Contact.
- A Shared Folder is created on the admin side and shared with one Client, several Clients, Circles or Staff.
- A File Request asks someone to upload files to you by email, whether or not they have an account. Each file can be up to 10GB.
- File Transfer sends files through a secure download link. The recipient needs no account, and you can add a password, a download limit and an expiry date.
- A Folder Generator (Thrive and Pinnacle) is a predefined set of folders and files that you apply to a Contact, Company, Staff member or Project.
- File storage is 100GB on Start, 500GB on Thrive and 2000GB on Pinnacle. Uploads stop when the quota is reached.
Help articles: Files toolkit, Shared Folders, Who sees what, File Requests, File Transfer, Folder Generators.
Messages, Live Chat and Support Tickets
- Messages (Secure Messaging) keeps each conversation in a Thread, with an Inbox, Sent, Trash, Canned Responses and your own Folders. An Admin can limit which Staff members Prospects and Clients may message.
- By default SuiteDash runs in Privacy Mode: message content is left out of email notifications. Convenience Mode puts the content in the email and lets people reply by email, but then HIPAA compliance can no longer be guaranteed.
- Live Chat is real-time chat. Staff chat with each other in direct messages and group Channels, and one-on-one with Contacts and Companies.
- Support Tickets (Pinnacle) is a help desk for your Contacts. Tickets come in through the portal, a Support Ticket Form, or email, and are sorted into Inboxes you define, with Statuses you can rename and reorder.
- The bell icon opens each user’s notifications, such as Task assignments, file uploads, Appointment changes, billing events and Messages.
Help articles: Secure Messaging, Limiting who Contacts can message, Privacy and Convenience Mode, Live Chat, Support Tickets, Ticket Inboxes, Notification Center.
Calendar, Appointments and Meetings
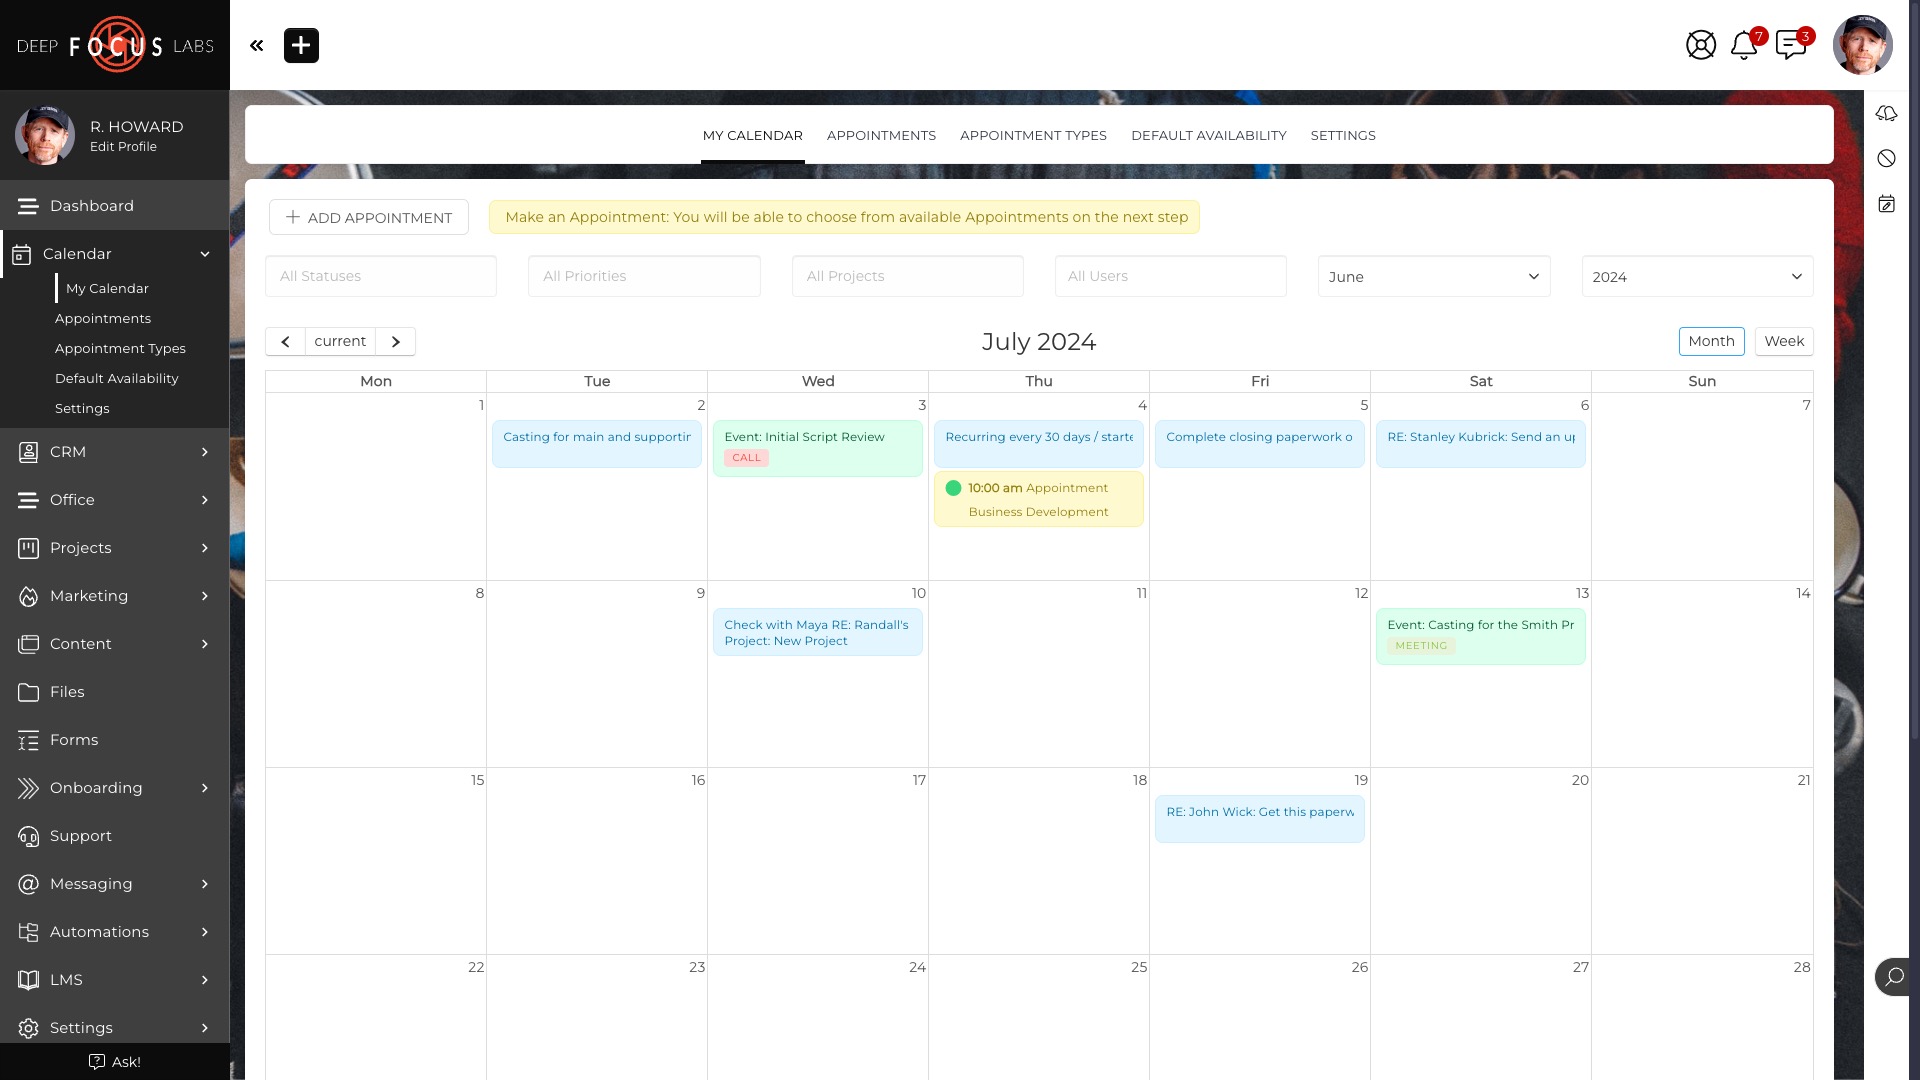
- Every user has a Calendar (Calendar > My Calendar) showing their Appointments, Follow-ups and due Tasks.
- An Appointment Generator (formerly called an Appointment Type) is a kind of Appointment that Contacts can book, such as a Consultation. Create it under Calendar > Appointment Generator as free or paid (this cannot be changed later), assign a Staff member, and, for bookings made from the Calendar, show it to all Contacts or only certain Circles. That Circle setting does not apply when the Appointment Generator is used inside a Form or triggered by an Automation.
- Set your weekly availability under Calendar > Availability. Scheduling settings control Appointment length, padding between Appointments, time slot intervals and how far ahead Contacts can book. Contacts then book open slots themselves.
- Each Appointment Generator can send its own booking notifications and reminders, and can create a meeting link for every booking with Zoom, Google Meet, Microsoft or your own meeting link. Connect Zoom or Google Meet under Flyout Menu > Integrations.
- Google Calendar and Microsoft Outlook Calendar connect with a two-way sync.
- A Booking Form lets people book free or paid Appointments from your website, a direct link, a QR code or the portal. A new visitor gets a new CRM record.
- Meetings are group events, such as workshops, webinars and classes, where many people reserve seats in one scheduled session. People register through a Booking Form, and a Meeting can charge for seats.
Help articles: My Calendar, Calendars and schedules, Scheduling an Appointment, Own meeting link, Zoom, Google Calendar, Booking Form, Meetings.
Billing: Invoices, Estimates, Subscriptions and payments
- Invoices are created in Office > Invoices, and the Client views and pays them in the portal. Copy Payment Link gives a link the Client can pay from without logging in.
- Online payment needs a connected Payment Gateway, set up in Office > Gateways. Stripe, Stripe ACH, Braintree, Authorize.net, PayPal and Square are supported, and you can connect more than one. PayPal takes one-time Invoice payments only. A payment made outside SuiteDash, such as a check, is logged with Record Payment.
- Set the default currency in Office > Settings > Invoices (and Estimates). Add more currencies in Flyout Menu > Content Settings, on the Manage Currency tab.
- Items, Add-ons and Packages are created in Office > Settings, each on its own tab, and each can be a one-time charge or a Subscription Plan. A Package groups Items and Add-ons into one offer. Taxes are percentages created in Office > Settings > Taxes.
- Office > Settings > Invoices sets the Invoice number prefix, default Terms and notes, and payment reminder emails.
- Invoices can use one of twenty ready-made Invoice Templates, which take their colors from Platform Branding.
- Estimates are created in Office > Estimates. When a Client approves one, it can turn into an Invoice automatically. An Estimate can be Standard or offer a choice of optional Items.
- A Recurring Invoice Generator creates the same Invoice on a schedule for the Client to pay each time. A Subscription Plan is different: it charges the Client’s saved payment method automatically every billing cycle.
- An Accumulating Generator works like a running tab: Items added during the period go on one Invoice at each scheduled run.
- An On-Demand Invoice Generator is a pre-built Invoice that creates a new Invoice for a chosen Client when triggered by a Kickoff Form, manually, or by an Automation (Pinnacle).
- Subscription Plans are created in Office > Settings > Plans and set the rate, the billing cycle, an optional trial period and whether the plan ends. Active Subscriptions are listed in Office > Subscriptions.
- Office > Expenses records one-time or recurring Expenses, which can be marked billable and added to a Client’s Invoice. Office > Reporting has ready-made reports such as Accounts Receivable Aging, Payments Received and Profit and Loss.
- The QuickBooks Online integration syncs one way, from SuiteDash to QuickBooks.
Help articles: Invoices, Payment Gateways, Payment Types, Currency, Items, Add-ons, Packages, Taxes, Invoice and Estimate settings, Invoice Templates, Estimates, Recurring Invoice Generators, Accumulating Generators, Invoice Generators, Subscription Plans, Expenses, Reporting, QuickBooks Online.
Proposals, Documents and eSign
- Proposals (Thrive and Pinnacle) are created in Office > Proposals. The Contact reads the pages and approves the Proposal by signing it, or rejects it. Copy Approve Link lets them do this without logging in.
- Proposal Full Templates hold the pages plus styling such as colors, fonts and logo. Page Templates are single pre-made pages you can add to any Proposal. A Proposal’s value is a fixed amount or the total of a Proposal Options block.
- A Proposal Generator is an unassigned Proposal design that creates a Proposal for a Contact when triggered, for example by a Kickoff Form or an Automation (Pinnacle).
- A Document is a written agreement, such as a contract, between you and a Contact or Staff member, which they view and eSign inside SuiteDash. There is no separate Contract record: contracts are Documents with eSigning turned on.
- Documents are made from a Document Generator in Office > Documents. One Generator with Dynamic Data Placeholders produces personalized Documents for many people. eSigning is turned on per Document Generator, and can require the recipient’s signature, a Staff member’s signature, or both.
- A Document can be tied to an Invoice, Estimate or Project so that its placeholders fill in from that record.
- Uploading your own PDF and placing signature fields on it is PDF Signing, which needs the PRIME Bundle Power-Up.
- A Sales Room (on plans that include Proposals) is a private, no-login mini-site for one Contact, built from a Sales Room Generator.
Help articles: Proposals, Proposal Templates, Proposal settings, Creating a Document, Document Generators, Digital signing, PDF Signing, Sales Rooms.
Forms
- Form types: Kickoff, Update, Booking, Checkout, Support Ticket and General Forms, plus Work Request, Intent (Menu of Services), Subscriber and Quiz Forms.
- A Kickoff Form is a public Form, shared by link or embedded on your website, that adds a new Prospect or Client to your CRM when submitted. You choose the Role and the Coordinator for new Contacts. With the Client Role, Paid Portal Access can make the Client pay before entering the portal.
- An Update Form can only be opened by a signed-in user. It writes the answers to that person’s CRM profile, overwriting existing values.
- A General Form works inside or outside the portal. Its submissions are stored but not linked to a Contact’s CRM profile.
- A Subscriber Form only adds the person to an Email Marketing Audience.
- A Booking Form books Appointments; a Checkout Form lets someone pick Items, Add-ons or Packages and pay on the page, which adds them as a Client and creates a paid Invoice; a Work Request Form lets Clients request work; an Intent Form publishes a Menu of Services with no payment or login; a Quiz Form turns a published Quiz into a public, branded quiz. A Support Ticket Form needs Pinnacle.
- Custom Fields on a Kickoff or Update Form save what the person enters to their Contact or Company profile.
- Conditional Logic shows or hides fields based on earlier answers, on every Form type. Field types include single-line and multi-line text, email, checkbox, date, dropdown, multiple choice, file upload, URL and number.
- Forms can use more than 30 ready-made Form Themes, and any Form can be saved as a Form Template for reuse.
Help articles: Forms overview, Kickoff Forms, Update Forms, General Forms, Subscriber Forms, Checkout Form, Work Request Form, Intent Form, Quiz Forms, Conditional Logic, Field types, Form Themes, Form Templates.
Automation: FLOWs, Automations and Checklists
- FLOWs, Trigger/Action Automations, Checklists and the LMS are on the Pinnacle plan only.
- A FLOW is an automated sequence of Steps that a Contact or Staff member completes, such as filling in Forms, uploading or downloading files, booking an Appointment and eSigning documents. Step types include Read & eSign, File Upload, File Download, Appointment, Form, Checklist and Quiz.
- An On-Boarding FLOW is a set of Steps a new Prospect or Client must finish before they can use the platform. It can be assigned when you create the Contact, through a Kickoff Form, or by CSV import. An On-Demand FLOW can be assigned at any time. Create FLOWs under Onboarding > FLOWs.
- No-Code Automations (the plan pages call them Trigger/Action Automations) are chainable actions that run after events in the platform. They are available in CRM, Projects, Office, FLOWs, Forms, LMS, Schedules and Manage Staff, and Automations can run when a FLOW Step or a whole FLOW is completed.
- An Auto-Template is a saved set of Automations you can run from a Contact or Company, or apply to many at once.
- A Schedule is a set of Automations timed around a Based-On Date, such as a date Custom Field or an Appointment booking.
- Checklists are simple lists of items for a Prospect, Client or Staff member, and each item can carry its own actions. Create them under Onboarding > Checklist Generators and assign them from the CRM, a Kickoff Form, a FLOW or an Automation.
- An Email Cannon (one richly formatted email to one Contact) and a Form Cannon (emailed links to Forms that need no login) need the PLUS Bundle Power-Up.
Help articles: FLOWs, FLOW Steps, No-Code Automations, Auto-Templates, Schedules, Checklists, Email Cannons, Form Cannons.
Email marketing
- An Audience is a list of names and emails that Email Campaigns go to (Marketing > Audiences). People are added by hand, from the CRM or a CSV file, by automation, or by subscribing themselves. A Circle can keep an Audience in sync with its members. An Audience kept in sync with a Circle takes no CSV import.
- An Email Campaign is an email you send right away or schedule, to one or more Audiences. Campaign Templates are reusable starting points. Campaigns are on every plan.
- Drip Sequences (Thrive and Pinnacle) send emails automatically after someone joins an Audience, each at an interval you set. A Reverse Drip Sequence sends before a set date instead. Automation Drips, which run Automations on the same timeline, need Pinnacle.
- Before sending Campaigns or Drip Sequences, set up Email Sending Settings under Marketing > Settings, for example SMTP from your own provider or a SendGrid API key. The optional Deliverability Service Subscription sends marketing email through a dedicated, monitored channel.
Help articles: Audiences, Email Campaigns, Campaign Templates, Drip Sequences, Email Sending Settings.
LMS and Quizzes
- The LMS (Pinnacle) is organized as Products that contain Courses, and Courses that contain Modules and Lessons. A Course can run Automations when someone completes it.
- Quizzes are sets of questions with a passing score, or with Outcome scoring. A Quiz Stop puts a published Quiz into a Course, after a Lesson, at the end of a Module, or before the Course counts as complete.
Help articles: LMS, Courses, Quizzes, Quiz Stops.
A.I. inside SuiteDash
- Platform Assistant is SuiteDash’s built-in A.I. assistant. It opens after the Free Trial Setup Wizard and suggests next steps based on the business details entered there.
- SuiteDash’s A.I. features run either on the paid A.I. Service (usage measured in Credits, with a free monthly tier) or on your own provider key through A.I. Connections (bring your own key), with providers such as OpenAI, Google Gemini, Anthropic, Mistral and Ollama. Only the Super Admin and Admin Managers can set up A.I. Connections.
- An A.I. Agent is a named A.I. teammate that works alongside your Staff, and a Skill is one job it runs. Staff can brief an Agent in chat; it works with that Staff member’s permissions and changes nothing until they press Confirm.
- The official SuiteDash MCP lets outside A.I. apps (Claude, ChatGPT, Cursor and others) use the same tools as the in-app A.I. Agents, as the staff member who connected them. Admins control it under A.I. Studio > MCP Access in the Flyout Menu. See Connect through the official MCP.
- A.I. Brand Voice records your tone, what your business does and who your customers are, so SuiteDash’s A.I. writing sounds like your business. A.I. Rewrite rewords text you already wrote and keeps its formatting and placeholders.
Help articles: Free Trial Setup Wizard, A.I. Connections, A.I. Service, A.I. Agents and Skills, A.I. Agents in chat, A.I. Brand Voice, A.I. Rewrite, Connect your A.I. app to your portal (MCP).
Integrations and add-ons
- The official SuiteDash MCP connects Claude, ChatGPT or another A.I. app to the account with OAuth sign-in, from My Account > Connections. See Connect through the official MCP.
- Zapier connects SuiteDash to thousands of other apps; start from Flyout Menu > Integrations.
- Webhooks can be sent from a webhook action inside Automations (Pinnacle), and Billing and Project webhooks are switched on under Flyout Menu > Integrations > Webhooks.
- The Secure API (Flyout Menu > Integrations > Secure API) allows 400 calls a month on Start, 2,000 on Thrive and 20,000 on Pinnacle. Only Super Admins and Admins can use it.
- Texting your Contacts works two ways. Managed Texting gives your business its own texting number with no outside account or API keys: the platform buys the number, registers your business with the carriers and bills your PortalBank balance. Only the Super Admin can set it up, it texts US phone numbers only, and texts and replies live in the SMS Inbox.
- Connecting your own Twilio account instead enables the Send SMS Automation and SMS Appointment reminders.
- Google Calendar, Microsoft Outlook Calendar, Zoom and Google Meet: see Calendar, Appointments and Meetings. QuickBooks Online: see Billing.
- Power-Ups add features to a plan for a monthly fee. The PLUS Bundle adds Email Cannons, Form Cannons, Secure Credit Card Vaulting and extra file storage. The PRIME Bundle adds the Sales Funnel Builder, PDF Document Signing and embeddable Remote Chat.
- Service Subscriptions are usage-based services SuiteDash passes through at cost with no markup, such as Deliverability, Hosted Video and A.I. credits. They are added from Manage Account after upgrading to a paid plan.
Help articles: Zapier, Webhooks, Webhook Templates, Secure API, Managed Texting, Twilio, Power-Ups, Service Subscriptions, Connect your A.I. app to your portal (MCP).
Glossary
| Term | Meaning in SuiteDash |
|---|---|
| Contact | A person in your CRM. Every Contact has one Role: Lead, Prospect or Client. |
| Lead | A Contact you are tracking with no concrete business plans yet. Cannot log in. |
| Prospect | A Contact who can log in to your portal before becoming a Client. |
| Client | A Contact you are officially doing business with. Can be invoiced and assigned to Projects. |
| Company | A business in your CRM, represented by its Primary Contact. |
| Primary Contact | The person who receives a Company’s correspondence and enters its portal. |
| Circle | A group of Prospects and Clients used to assign Dashboards, Portal Pages and Files. Members cannot see each other. |
| Staff | Your internal users: Super Admin, Admin, Project Manager, Office Manager, Teammate, Salesperson, Freelancer. |
| Team | A group of Staff. |
| Flyout Menu | The menu that opens when you click your profile image. Branding, Custom Fields, Staff and Integrations live there. |
| Office | The billing area: Invoices, Estimates, Proposals, Documents, Subscriptions, Expenses and Reporting. |
| Portal Access Invitation | The email that lets a Prospect or Client register and log in. Cannot be taken back once sent. |
| Dashboard | A logged-in user’s home screen. Assigned by person, then Circle or Team, then Role. |
| Portal Page | A private page for the logged-in users assigned to it. |
| Landing Page | A public page anyone with the link can open. |
| Start Page | The page a user lands on right after logging in. |
| Block, Stack | The building pieces of the Content Block Editor; a Stack is a reusable group of Blocks. |
| Custom Field | A field you define to store your own information on records. |
| Dynamic Data Placeholder | A tag that fills in the viewer’s own data on a page or Document. |
| Generator | A pre-configured template that creates a new item each time it is applied: manually, by an Automation, or on a Schedule. |
| Task Template | A pre-built set of Tasks and Phases applied to a Project (called Project Templates on the plan pages). |
| Project Generator | A pre-configured Project that creates a real Project for a Client when triggered. |
| Work Request | A request for work a Client submits, convertible to an Estimate, an Invoice or a Project. |
| Kickoff Form | A public Form that adds a new Prospect or Client to your CRM. |
| Update Form | A Form for signed-in users that writes answers to their profile. |
| FLOW | A sequence of Steps a Contact or Staff member completes (Pinnacle). |
| No-Code Automation | Chainable actions that run after events; called Trigger/Action Automations on the plan pages (Pinnacle). |
| Auto-Template | A saved set of Automations. |
| Checklist | A simple list of items for someone to complete (Pinnacle). |
| Cannon | An Email Cannon or Form Cannon (PLUS Bundle Power-Up). |
| Audience | A list of names and emails that Email Campaigns and Drip Sequences go to. |
| Drip Sequence | Emails sent automatically at set intervals after someone joins an Audience (Thrive and Pinnacle). |
| Payment Gateway | The connected payment processor: Stripe, Stripe ACH, Braintree, Authorize.net, PayPal or Square. |
| Item, Add-on, Package | What you sell, set up in Office > Settings. A Package groups Items and Add-ons. |
| Subscription Plan | A recurring price that charges the Client’s saved payment method each cycle. |
| Document Generator | The template that produces personalized Documents, optionally with eSigning. |
| Impersonate | Seeing the platform exactly as a chosen Contact or Staff member would. |
| Power-Up | An optional feature bundle added to a plan for a monthly fee. |
| Service Subscription | An optional usage-based service, such as Deliverability or A.I. credits, passed through at cost. |
| Platform Assistant | SuiteDash’s built-in A.I. assistant inside the app. |
| MCP | The standard way outside A.I. apps connect to your portal. Your MCP address is on My Account > Connections. Lets a Staff member’s A.I. app work in the account with their permissions after OAuth sign-in. |
| MCP Access | The setting in A.I. Studio that decides which Staff roles can connect A.I. apps, and which Tools and Skills those apps can use. |
Setup prompts (for people)
A.I. assistants: this section is for the people you help, so you can skip it.
Not sure where to begin? Use the starter prompt. Each prompt below does one setup job. Copy it, replace the words in [square brackets] with your own details, and paste it into ChatGPT, Claude, Gemini or the assistant you use. Each prompt asks the assistant to read this page first. A chat assistant plans and drafts while you click, unless you have connected it through the official MCP (see Connect through the official MCP): then it can do part of the setup for you, and asks you first before anything except a staff-only draft. A browser agent, such as Claude in Chrome or ChatGPT agent mode, can click through the setup in your own signed-in tab, and the prompt tells it to stop and ask before anything that emails your clients or cannot be undone. If your assistant cannot open this page, copy the text from https://suitedash.com/ai-context.md and paste it into the chat first, then paste the prompt.
1. A setup plan for my business
What you get: a step-by-step SuiteDash setup plan for your business, in the order to do it.
First read https://suitedash.com/ai-context/ and use only what it says about SuiteDash. If it does not cover something, say so and point me to help.suitedash.com. If you are connected to my SuiteDash portal or can work in my browser, tell me what you will do before each step, and stop and ask before anything that emails my clients or cannot be undone. If you cannot, give me steps I can click through myself.

I run [your business type]. I sell [your main services] to [who your clients are]. My team is [just me, or how many people].

Write my SuiteDash setup plan in the order I should do it: my branding, how I organize my Clients, my client portal, how I get paid, and what to automate later. For each step, name the SuiteDash feature I will use and link its help article from the page.
2. Map my services to SuiteDash toolkits
What you get: a table that shows which SuiteDash toolkit handles each step of each service you sell.
First read https://suitedash.com/ai-context/ and use only what it says about SuiteDash. If it does not cover something, say so and point me to help.suitedash.com. If you are connected to my SuiteDash portal or can work in my browser, tell me what you will do before each step, and stop and ask before anything that emails my clients or cannot be undone. If you cannot, give me steps I can click through myself.

I run [your business type]. I offer these services: [service 1], [service 2], [service 3]. This is how I deliver them: [for example meetings, documents, monthly retainers, files from the client].

Make a table with each service, each step of delivering it, and the SuiteDash toolkit that handles that step. Mark any step that needs a higher plan than [your plan, or "I have not chosen a plan yet"].
3. My client onboarding flow
What you get: your onboarding from first contact to active Client, as numbered steps, with the SuiteDash piece for each.
First read https://suitedash.com/ai-context/ and use only what it says about SuiteDash. If it does not cover something, say so and point me to help.suitedash.com. If you are connected to my SuiteDash portal or can work in my browser, tell me what you will do before each step, and stop and ask before anything that emails my clients or cannot be undone. If you cannot, give me steps I can click through myself.

I run [your business type]. Today a new client starts with me like this: [for example an inquiry, a call, a proposal, a payment, a kickoff].

Design my client onboarding in SuiteDash, from first contact to active Client, as numbered steps: when the person is a Lead, a Prospect and a Client, which Form they fill in, what they sign and pay, and what they see when they first log in to my portal. If a step needs the Pinnacle plan (for example a FLOW), say so and also give me a version that works on [your plan].
4. My intake form
What you get: the complete question list for your intake Form, with field types and which answers to keep as Custom Fields.
First read https://suitedash.com/ai-context/ and use only what it says about SuiteDash. If it does not cover something, say so and point me to help.suitedash.com. If you are connected to my SuiteDash portal or can work in my browser, tell me what you will do before each step, and stop and ask before anything that emails my clients or cannot be undone. If you cannot, give me steps I can click through myself.

I run [your business type]. Before I start work with a new client, I need to know [what you need to learn from them].

Write my intake Form: a short intro, each question, its field type, whether it is required, and which answers I should save as Custom Fields so I can reuse them later. Then tell me which type of SuiteDash Form fits best and why.
5. My portal welcome text
What you get: ready-to-paste welcome text for the first screen your Clients see in your portal.
First read https://suitedash.com/ai-context/ and use only what it says about SuiteDash. If it does not cover something, say so and point me to help.suitedash.com. If you are connected to my SuiteDash portal or can work in my browser, tell me what you will do before each step, and stop and ask before anything that emails my clients or cannot be undone. If you cannot, give me steps I can click through myself.

I run [your business type]. My brand voice is [friendly, formal, plain]. The first things a new Client should do are [for example complete a form, upload documents, book an appointment].

Write the welcome text my Clients see when they first log in to my portal: a short headline, under 120 words of copy, and three clear next steps. Then tell me where this text goes in SuiteDash, for example a Dashboard or a Portal Page.
6. My first Proposal and Invoice templates
What you get: the wording and line items for your first Proposal template and a matching Invoice template.
First read https://suitedash.com/ai-context/ and use only what it says about SuiteDash. If it does not cover something, say so and point me to help.suitedash.com. If you are connected to my SuiteDash portal or can work in my browser, tell me what you will do before each step, and stop and ask before anything that emails my clients or cannot be undone. If you cannot, give me steps I can click through myself.

I run [your business type]. I sell [your main service] for [your price, and how you charge: one time, monthly, by the hour]. My payment terms are [for example due in 14 days].

Draft my first Proposal template: its sections, the wording, and the line items with prices. Then draft a matching Invoice template with the same items, my payment terms and a short thank-you note. Tell me which parts need the Thrive or Pinnacle plan.
7. My standard job as a Project Template
What you get: the Phases and Tasks of your most common job, ready to enter as a Project Template.
First read https://suitedash.com/ai-context/ and use only what it says about SuiteDash. If it does not cover something, say so and point me to help.suitedash.com. If you are connected to my SuiteDash portal or can work in my browser, tell me what you will do before each step, and stop and ask before anything that emails my clients or cannot be undone. If you cannot, give me steps I can click through myself.

I run [your business type]. My most common job is [describe it]. It usually takes [how long], and these people work on it: [roles].

Break it into Phases and Tasks for a SuiteDash Project Template. For each Task, say who does it, how many days after the start it is due, and which Tasks I should assign to the Client.
8. My first automations, step by step (Pinnacle)
What you get: the two or three automations that save you the most time, described trigger by trigger, ready to build on Pinnacle.
First read https://suitedash.com/ai-context/ and use only what it says about SuiteDash. If it does not cover something, say so and point me to help.suitedash.com. If you are connected to my SuiteDash portal or can work in my browser, tell me what you will do before each step, and stop and ask before anything that emails my clients or cannot be undone. If you cannot, give me steps I can click through myself.

I run [your business type] and I am on, or trying, the Pinnacle plan. These are the jobs I do by hand over and over: [list them, for example send a welcome message after payment, start a project when a proposal is signed].

Pick the two or three that will save me the most time. For each one, describe it step by step: what starts it, what happens next, and whether a FLOW or a Trigger/Action Automation fits better. Only use triggers and actions the page describes. If you are not sure one exists, tell me to check help.suitedash.com.
9. My team roles
What you get: which role each person on your team gets, how to group them, and what each person should see.
First read https://suitedash.com/ai-context/ and use only what it says about SuiteDash. If it does not cover something, say so and point me to help.suitedash.com. If you are connected to my SuiteDash portal or can work in my browser, tell me what you will do before each step, and stop and ask before anything that emails my clients or cannot be undone. If you cannot, give me steps I can click through myself.

I run [your business type]. My team is: [each person or role, and what they do].

Suggest how to set my team up in SuiteDash: which role each person gets, whether to group them into Teams, and what each person should and should not see. Keep each Client's information visible only to the people who need it.
10. My client groups (Circles)
What you get: the Circles to create for your Clients, and what to share with each one.
First read https://suitedash.com/ai-context/ and use only what it says about SuiteDash. If it does not cover something, say so and point me to help.suitedash.com. If you are connected to my SuiteDash portal or can work in my browser, tell me what you will do before each step, and stop and ask before anything that emails my clients or cannot be undone. If you cannot, give me steps I can click through myself.

I run [your business type]. My Clients fall into these groups: [for example by service, by package, or by stage].

Suggest the Circles I should create in SuiteDash. For each Circle, list which Dashboards, Portal Pages and Files its members should get. Remember that people in the same Circle cannot see each other.
11. Which plan fits my setup
What you get: a plain comparison of Start, Thrive and Pinnacle against the setup you actually want.
First read https://suitedash.com/ai-context/ and use only what it says about SuiteDash. If it does not cover something, say so and point me to help.suitedash.com. If you are connected to my SuiteDash portal or can work in my browser, tell me what you will do before each step, and stop and ask before anything that emails my clients or cannot be undone. If you cannot, give me steps I can click through myself.

I run [your business type]. This is what I want SuiteDash to do for me: [list it].

Using only the plan section of the page, tell me which of Start, Thrive and Pinnacle covers it, what I would give up on each lower plan, and how I could work around each gap. Point me to suitedash.com/pricing for current prices.
12. My week-one checklist
What you get: a day-by-day checklist for your first week of setup, small enough to finish.
First read https://suitedash.com/ai-context/ and use only what it says about SuiteDash. If it does not cover something, say so and point me to help.suitedash.com. If you are connected to my SuiteDash portal or can work in my browser, tell me what you will do before each step, and stop and ask before anything that emails my clients or cannot be undone. If you cannot, give me steps I can click through myself.

I run [your business type]. I sell [your main services] to [who your clients are]. I can spend [hours per day] on setup this week.

Make me a day-by-day checklist for my first week in SuiteDash: what to set up each day, in order, with the help article for each item. Put first the things my first Client will see.